You're standing in a place you've dreamed about for years. The light is beautiful, the air feels different, people move through the scene with a rhythm that belongs only to that city, coast, market, or mountain trail. Then you lift your camera or phone, take the shot, and later it looks ordinary. Flat. Crowded. Nothing like what you felt.
That gap is where most travel photographers get stuck.
Strong travel photography techniques don't start with expensive gear. They start with intention. Good light, better timing, cleaner composition, respect for the people in front of your lens, and a habit of looking one step beyond the obvious. That matters even more now, because many amateur travel photos are still made from roughly eye level, around 5 to 6 feet off the ground, which often flattens a scene instead of shaping it into a story, as noted in Allianz Travel Insurance's photography guide.
The fix usually isn't complicated. Change your height. Shift your angle. Put one subject first instead of treating everything in the frame as equal. Canon's travel guidance reinforces that same principle through deliberate composition, lens choice, and focal length, rather than hoping a busy scene will organize itself.
These 10 travel photography techniques are practical, affordable, and built for real trips. Crowded places. Tight budgets. Fast-moving streets. Unpredictable weather. They'll help you make photos that feel like the place you visited, not just proof that you stood there.
1. Golden Hour Photography
Golden hour earns its reputation because it solves several problems at once. It softens harsh contrast, warms color, and gives buildings, faces, and scenery a shape that midday light often strips away. If you've ever photographed a temple, old street, or harbor and wondered why it looked lifeless at noon, this is usually the reason.
Travel guides consistently recommend paying close attention to light, and they separate the uses of each kind of daylight clearly. Harsh midday sun can be difficult for portraits but useful for architecture and bright water, while golden hour is often more flattering for people, natural scenery, and buildings, as described in Belinda Shi's travel photography tips.
Make the light do the work
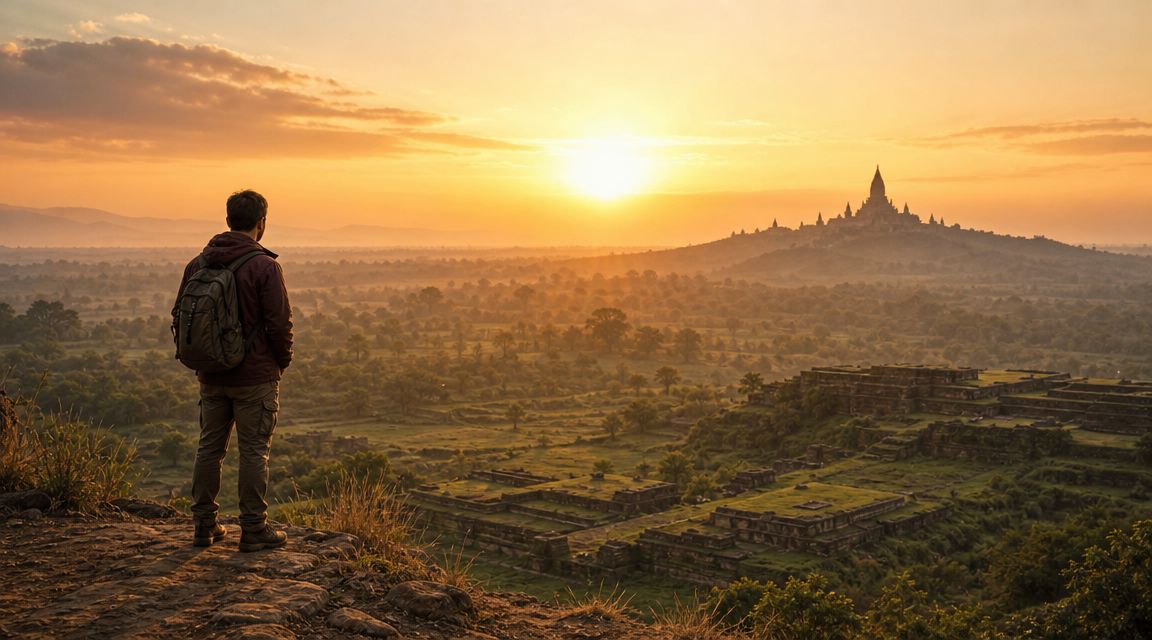
At sunrise, old stone, weathered doors, and textured streets suddenly become easier subjects. You don't need dramatic action if the light itself creates drama. In a place like Angkor Wat or a canal city at dawn, the warm side light can carry the whole frame.
The mistake is arriving exactly at sunrise with no plan. Golden hour is short. If you're still searching for your angle when the light peaks, you've wasted the best part.
Practical rule: Scout the location the day before, then return early enough to be ready before the light turns good.
A lower shooting angle often helps here too. Recent guidance on travel photography notes that changing height and perspective is one of the simplest ways to make an image more memorable, especially compared with the standard eye-level tourist shot.
Budget-friendly ways to use it well
You don't need a premium camera body for this. A phone with grid lines turned on, a clean lens, and a stable stance can produce strong golden hour images if your composition is intentional.
- Arrive early: Give yourself extra travel time so you're not rushing the shot.
- Pick one clear subject: A person, dome, tower, fishing boat, or archway should lead the image.
- Shoot toward texture: Stone walls, ripples, tiles, and dust all look better in angled light.
- Protect highlights: If the sky is bright, expose carefully so it doesn't wash out.
- Build the rest of the day around it: Use slow midday hours for food, transit, or planning.
If you're shaping a coastal itinerary around better light, a place with beaches, marshes, and changing skies like things to do in Cape Cod gives you plenty of sunrise and sunset options without needing complicated logistics.
2. Street Photography for Cultural Narrative
Street photography works when you stop chasing spectacle and start noticing routine. The strongest frames often come from ordinary actions done with purpose. A vendor arranging fruit. A mechanic pausing at his doorway. Children weaving around commuters. Those moments carry more truth than another wide shot of a famous square.
This technique is less about speed than attention. You're reading body language, movement, and social rhythm. You're also deciding what kind of traveler you want to be. Respectful street photography never treats local people as background decoration.

Work with presence, not stealth
In some places, candid shooting blends naturally into public life. In others, it reads as intrusive immediately. Learn the difference. Dress unassumingly, move slowly, and spend time watching before you raise the camera. If someone notices you, acknowledge them instead of pretending otherwise.
A fixed focal length helps because it makes you commit. A 35mm or 50mm equivalent on a phone or camera forces you to move your feet and think about distance. That discipline improves composition fast.
Some of the best street photos happen after you lower the camera once, smile, and wait.
What works in the field
The strongest cultural images usually show interaction, not isolation. A market stall is more interesting when a buyer leans in. A tea stand becomes a story when steam, hands, cups, and faces all connect.
- Research local norms: Some destinations are relaxed about photography. Others expect permission.
- Practice at home first: Your own city is the cheapest training ground you have.
- Watch the edges: Signs, poles, and bright clutter can ruin a strong moment.
- Stay for patterns: The second or third interaction in the same spot is often better than the first.
- Offer the image back: Showing the photo on your screen can turn a transaction into a connection.
This approach pairs naturally with slow travel principles, where time in one neighborhood often matters more than racing through landmarks.
3. Layering and Depth Composition
You arrive at a viewpoint everyone photographs. The light is good, the scenery is impressive, and the first frame still looks ordinary. The usual problem is depth. If every element sits on one plane, the scene feels smaller in the photo than it did in person.
Layering solves that. It gives the eye somewhere to enter, somewhere to pause, and somewhere to finish.
A strong travel frame often has three working distances: something close to the lens, a subject that explains the place, and a background that completes the setting. That could be a steaming cup on a café table with a street beyond it, or wildflowers leading into a village and distant mountains. Expensive gear is optional. Position matters more.

Build the frame from front to back
Start with the background, but do not stop there. Travelers often lock onto the obvious landmark and miss the empty foreground, which is why scenic overlooks produce so many interchangeable images.
Look near your feet and near the edge of the lens. A chair back, fruit crate, doorway, ferry rail, prayer flag, or window frame can add structure fast. The trade-off is real. A foreground object can create depth, but it can also feel messy if it is brighter than the subject or too large in the frame. Keep it supportive.
Layering also works best when the foreground belongs to the place. Use context, not random clutter. In culturally sensitive settings, avoid inserting yourself into private moments just to get a human layer. A respectful step to the side usually beats pushing closer.
A simple field method
I teach this as a short checklist because it works under pressure and does not cost anything.
- Background: Choose the cleanest version of the scene first.
- Middle ground: Place the main action, building, or person where the setting still reads clearly.
- Foreground: Add texture, scale, or context without blocking the story.
- Connection: Use roads, tabletops, shadows, arches, or rows of stalls to pull the eye through the frame.
- Height: Crouch, sit, or raise the camera overhead to separate layers more clearly.
One more practical habit helps. Wait for movement inside an already-built frame. A passerby entering the middle ground, a hand reaching for a cup, or smoke drifting through the background can turn a well-composed scene into a lived-in photograph.
This technique earns its keep because it works almost anywhere: markets, buses, coastlines, cafés, temple courtyards, and mountain roads. It rewards patience more than spending.
4. Perspective and Forced Perspective
You arrive at a famous square, raise the camera from standing height, and get the same flat photo hundreds of travelers made that morning. The scene feels bigger, stranger, and more alive than the frame suggests. Perspective fixes that, and it does it without expensive gear.
Changing viewpoint alters scale, distance, and tension inside the image. Kneel down and cobblestones start leading the eye. Step far back and a person becomes a measure of the building around them. Shift a meter to the left and lines that felt chaotic suddenly lock together.
Forced perspective is the playful branch of this technique. It can work well for travel memories, especially with friends or family, but it has a short shelf life if every frame turns into a visual joke. I get better results by treating it as one option, not the whole shoot.
The more useful version is usually subtle. A low angle can make hanging lanterns feel immersive instead of decorative. Shooting from a doorway can stretch a lane and give the viewer a clear path into the frame. Placing a small subject against a large cliff, mosque, station, or palace often says more about the place than a straight-on postcard view.
Trade-offs matter here. Wide lenses exaggerate distance and can make foreground objects feel dynamic, but they also distort faces and bend architecture near the edges. Tight framing simplifies alignment, but it can strip away the context that makes travel photographs worth keeping.
A practical method in the field
Use a short sequence and work it fast.
- Pick the anchor: Decide what the photo is really about. A tower, vendor cart, archway, doorway, or traveler.
- Choose your height: Start low, then chest height, then overhead if possible. Perspective changes more from height than from camera settings.
- Refine alignment: Move in small side steps until edges separate cleanly and the main shapes stop colliding.
- Control distance: Back up to reduce distortion, move closer to exaggerate scale, and compare both before settling.
- Check respect: At cultural or sacred sites, keep the scene calm. Do not block paths, direct strangers, or turn the location into a prop.
- Make one honest frame: After the playful version, shoot a straightforward image that preserves the place with dignity.
One habit helps more than any trick. Pause before pressing the shutter and inspect the frame edges. Perspective shots often fail because of half-cut signs, bright bags, or stray elbows slipping into the corners.
If you are working with a phone or a basic kit lens, that is enough. Good perspective comes from footwork, patience, and timing. Those are cheap tools, and on the road they usually matter more than gear.
5. Minimalist and Negative Space Photography
Some places ask for complexity. Others become stronger when you remove almost everything. Minimalist travel photography works by deciding what the photo is about, then stripping away every element that weakens that answer.
A lone figure crossing a plaza. A single fishing boat in open water. One painted door on an empty wall. These aren't sparse by accident. They succeed because the empty space carries mood.
Let the scene breathe
Travelers often crop too tightly because they're afraid of “wasting” the frame. In minimalist work, empty space isn't wasted. It's active. It creates isolation, calm, scale, or tension, depending on the subject.
The Rule of Thirds can assist once more. Place the subject off-center and let the surrounding sky, sand, sea, or wall do emotional work. If everything is centered and equally weighted, the image often feels static.
What to remove
Negative space photography is mostly a discipline of subtraction. You don't need a desert to do it. You need control over distractions.
- Simplify the background: Move until signs, cables, and stray people disappear.
- Use clean color fields: Whitewashed walls, fog, water, and sky work well.
- Keep one subject dominant: If two subjects compete, neither usually wins.
- Wait for separation: A person walking into open space is stronger than one lost in clutter.
- Use light as structure: Soft side light helps define a simple scene without overcomplicating it.
Minimalism also suits budget travel surprisingly well. Bus stations at dawn, bare hostels, ferry decks, remote roads, and quiet courtyards can all become strong frames if you stop expecting every great image to be epic.
6. Reflection and Mirror Photography
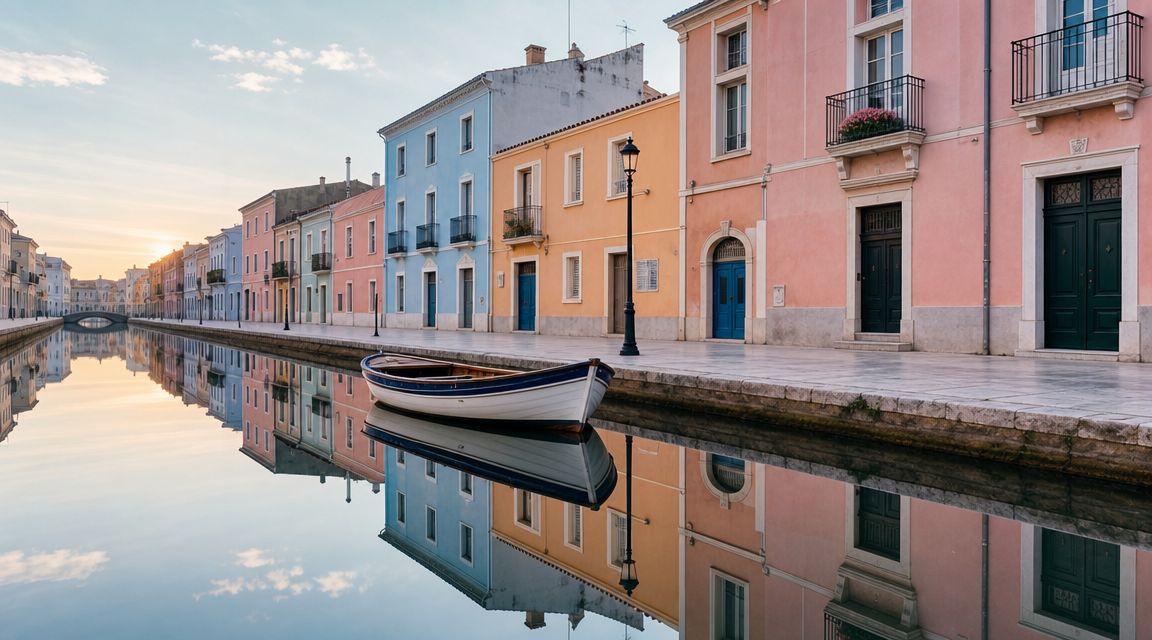
Reflections let you show two versions of a place at once. The direct scene and the echoed one. That duality can make a simple frame feel layered, poetic, or slightly surreal.
Water is the obvious option, but don't stop there. Shop windows, metal tables, train glass, mirrored ceilings, and rain puddles can all become tools. In cities especially, reflections help you photograph density without turning the frame into chaos.
Look after rain and at twilight
Puddles turn routine streets into temporary opportunities. A narrow alley with a wet surface can suddenly hold architecture, neon, footsteps, and sky in one composition. If you arrive after rain, don't complain about weather first. Look down.
Glass reflections can be just as useful. Photographing through a café window, for example, can combine indoor stillness with street movement outside. That's a strong way to show contrast between local routine and tourist pace.
Don't ask only what's in front of you. Ask what's bouncing back.
Keep control of the frame
Reflections become messy when the photographer doesn't decide which layer matters more. Is the reflected subject primary, or the actual subject? Make that choice before pressing the shutter.
- Test small angle changes: A half-step left or right can clean a reflection dramatically.
- Use partial reflection: Perfect symmetry isn't always the strongest option.
- Watch your own presence: Sometimes your reflection helps. Often it distracts.
- Expose for the brighter area: Reflective scenes can fool your camera.
- Try windows at markets and stations: They often reveal movement and place together.
This technique is especially good for photographing places that mix old and new. Historic buildings mirrored in glass storefronts, temple details reflected beside traffic, or quiet courtyards doubled in water can all tell a more layered travel story than a straight documentary frame.
7. Silhouette and Backlighting Photography
Silhouettes simplify. That's their power. In busy destinations, simplification can be the difference between a muddy image and a memorable one.
When the light source sits behind your subject, detail drops away and shape takes over. You stop relying on facial expression, clothing color, or background sharpness. Instead, you work with gesture, outline, and spacing. A cyclist, a fisherman, a dancer, a traveler crossing an archway. Those shapes read quickly and emotionally.
Expose for the bright part of the scene
The technical move is simple. Meter for the brighter sky or background and let the foreground go dark. If you expose for the person, you'll often lose the silhouette effect.
This works best when the subject's outline is recognizable. Two people standing shoulder to shoulder may merge into one shape. A person mid-step, a raised arm, or a bicycle profile reads much more clearly.
Travel guidance on light often emphasizes timing over volume of shots, and that's especially true here. The best result usually comes from the right moment, not from spraying the shutter endlessly.
Clean silhouettes beat dramatic clutter
Crowded backgrounds, intersecting poles, and messy edges ruin silhouettes fast. Keep the composition simple and use the brightest part of the scene as a clean backdrop.
- Shoot during low sun: Sunrise and sunset make backlighting easier to control.
- Separate limbs: Ask your subject to take a step so the outline is clear.
- Use architecture: Doorways, arches, and bridges frame silhouettes well.
- Try cultural distance respectfully: Silhouettes can show activity without making a person feel exposed.
- Keep the horizon tidy: A strong silhouette needs a readable edge.
This is one of the most useful travel photography techniques when you want mood without intrusion. It lets you photograph work, movement, and ritual in a way that can feel less invasive than pushing for close facial detail.
8. Detail and Macro Travel Photography
Wide shots tell you where you are. Detail shots tell you what a place feels like.
The cracked paint on a fishing boat. Threads on a loom. Steam rising from street food. Carved wood, tile glaze, worn coins, handwritten menu boards. These are often the pictures that make a travel series feel complete because they slow the viewer down.
Small subjects often carry the strongest sense of place
You don't need a dedicated macro setup to do this well. Many phones now focus close enough for useful detail work, and an affordable clip-on lens can extend that reach if you enjoy this style. Good detail photography is usually more about light and steadiness than magnification.
It also encourages respect. When you photograph a craftsperson's hands, a stack of spices, or embroidery in progress, you're often paying attention to labor and tradition rather than extracting a generic “local color” image.
A practical stock-oriented guide on travel shooting notes that you should maximize each location by taking multiple angles and perspectives because image-making is partly a numbers game. The same guide also observes that a traveler may get only about 1–5% good shots and 10–15% decent shots from a typical outing, which is exactly why details matter. They increase your chances of coming home with a richer set of usable images.
Good habits for close-up work
- Ask before leaning in: Markets and workshops are workplaces first.
- Use natural side light: Window light or open shade reveals texture beautifully.
- Stabilize yourself: Brace your elbows or use a nearby surface.
- Look for hands: They often tell the story better than the finished object.
- Support the maker: If you photograph someone's goods, consider buying something too.
If you want destinations that reward careful visual hunting, hidden gems in Europe often offer craft traditions, small markets, and quiet architectural details that big-ticket capitals can make harder to notice.
9. Environmental Portraiture and Cultural Storytelling
A good portrait shows a person. A strong environmental portrait shows a person in relation to their world.
That means the background matters. So do tools, textures, posture, and the way someone occupies their own space. A tea seller among shelves of tins tells a fuller story than the same person against a blank wall. A musician in rehearsal, a baker at the oven, a boat mechanic surrounded by paint and rope. Context gives the portrait depth and dignity.
Spend time before you shoot
This is not a technique for impatient travelers. If you ask for a photo the second you meet someone, you'll usually get a stiff expression and a thin image. Talk first. Ask about the work. Buy the tea. Sit down. Learn the rhythm of the space.
That time changes the picture because people stop posing for the camera and start settling back into themselves. You also make better decisions about what should remain in the frame.
Respect is visible in photographs. You can usually tell when it was earned and when it wasn't.
Frame the person with meaningful context
The environment should support the subject, not overwhelm them. If every shelf, sign, and hanging object fights for attention, the portrait loses clarity. Keep what explains the person's role and remove what doesn't.
- Ask clearly: Permission should be direct and understandable.
- Photograph people where they're comfortable: Their own space usually works best.
- Include tools of the trade: They anchor the story.
- Watch the background: Lines growing out of heads still ruin portraits everywhere.
- Share the result if possible: It builds trust and often leads to better follow-up images.
Travel that prioritizes connection over checklist sightseeing naturally creates better opportunities for this. Authentic travel experiences usually give photographers more than faces. They provide context, relationships, and reasons for the portrait to exist.
10. Composition Frameworks
You step into a narrow lane just after breakfast. Laundry hangs above the street, scooters cut through the light, and a vendor is arranging fruit under a striped awning. The scene has energy, but the frame still feels chaotic. Composition frameworks solve that problem fast. They give you a reliable way to organize a busy place without expensive gear or heavy editing later.
The three frameworks I use most on the road are the Rule of Thirds, leading lines, and natural framing. They show up almost everywhere. Alleys, ferry decks, temple gates, market aisles, bus windows, café doorways. A phone camera is enough if you can recognize the structure before the moment passes.
Start with one clear framework
Turn on the grid in your camera app and use it as a training tool, not a rulebook. Off-center placement often gives a subject breathing room and lets the setting do part of the storytelling. That matters in travel photography, where the place should usually support the image instead of disappearing behind a tight crop.
Leading lines handle a different problem. They pull the eye through the frame. Roads, rivers, shadows, handrails, tiled corridors, and rows of market stalls all create direction. Framing helps when a location is visually noisy. Use an arch, doorway, window, curtain, or foreground branch to contain the subject and cut distractions at the edges.
Keep it simple.
Trying to force every framework into one image usually produces a picture that feels stiff and overworked. One structure should lead. If a second one appears naturally, use it.
- Rule of Thirds: Place the subject off-center when the middle of the frame feels static.
- Leading lines: Use strong lines when the eye needs a path into the scene.
- Natural framing: Use it when the background is cluttered and you need cleaner edges.
- Change your height: Kneeling or shooting from a step often strengthens lines and framing immediately.
- Choose one subject: Frameworks improve organization, but they cannot fix a frame with no clear point of attention.
A practical checklist helps in the field, especially when time is short and attention is split between the camera, the street, and basic courtesy.
- Turn on the grid before you head out.
- Walk three steps left or right before pressing the shutter.
- Check the corners for bags, signs, elbows, and cropped distractions.
- Ask whether the environment adds meaning or just noise.
- Wait for one human gesture that completes the composition.
Historic cities are excellent practice because the design of the place does part of the work for you. If you are building a route around photography, this Florence itinerary for photographers and walkers is useful because the city offers arches, narrow streets, repeating windows, and long sightlines within a compact, walkable area.
One final trade-off matters. Strong composition can make a photo feel polished, but polish is not the goal by itself. In culturally sensitive settings, do not get so focused on geometry that you ignore permission, block foot traffic, or turn a real moment into a design exercise. Good travel composition should clarify the story and respect the place at the same time.
10-Point Comparison of Travel Photography Techniques
| Technique | 🔄 Implementation complexity | ⚡ Resource requirements | ⭐📊 Expected outcomes | 💡 Ideal use cases | Key advantages |
|---|---|---|---|---|---|
| Golden Hour Photography | Moderate, requires timing and scouting | Low, any camera; apps helpful | High, warm, cinematic color and depth | Landscapes, architecture, portraits at sunrise/sunset | Natural flattering light, minimal post-processing |
| Street Photography for Cultural Narrative | Moderate, needs social skills and ethical awareness | Low, smartphone or entry-level DSLR | High, authentic, emotionally rich cultural stories | Markets, streets, public transport, candid moments | Relatable content, deep cultural connection |
| Layering and Depth Composition | Moderate–High, needs scouting and compositional control | Low, any camera; tripod optional | High, immersive, three‑dimensional images | Landscapes, architectural scenes, market contexts | Professional-looking depth, strong contextual storytelling |
| Perspective and Forced Perspective | Low–Moderate, creative positioning and patience | Very Low, smartphone excels; wide angles helpful | Medium–High, playful, attention-grabbing images | Famous landmarks, playful tourist compositions | High engagement and originality with minimal gear |
| Minimalist and Negative Space Photography | Moderate, requires restraint and strong eye | Very Low, composition-focused, any camera | Medium, mood‑driven, memorable visual impact | Deserts, seascapes, minimal architecture, slow travel scenes | Stands out on feeds; conveys mood and solitude |
| Reflection and Mirror Photography | Moderate, timing and surface scouting required | Low–Moderate, any camera; polarizer useful | High, layered, poetic compositions with narrative depth | Lakes, puddles, windows, glass façades | Adds complexity and dual perspectives without extra subjects |
| Silhouette and Backlighting Photography | Moderate, precise positioning and exposure control | Low, any camera; golden/blue hour timing | High, bold, graphic shapes and dramatic mood | Sunrise/sunset figures, activities, architectural arches | Creates instantly recognizable, shareable imagery |
| Detail and Macro Travel Photography | Moderate, close proximity and focusing skill | Low–Medium, phone macro or budget macro lens | High, intimate, texture-rich storytelling | Crafts, food, textiles, artisanal details | Highlights craftsmanship and unique local stories |
| Environmental Portraiture and Cultural Storytelling | High, requires trust, consent, cultural sensitivity | Low, camera enough; significant time investment | Very High, meaningful, respectful cultural documentation | Workshops, homes, vendors, performers in context | Ethical, in-depth storytelling that honors subjects |
| Composition Frameworks (Rule of Thirds, Leading Lines, Framing) | Low–Moderate, teachable and repeatable | None, free skill development | High, consistent, balanced, professional results | Universal, applicable across all travel scenarios | Immediate improvement in image quality with no cost |
Your Next Chapter Starts Behind the Lens
You step into a busy square just after sunrise. Vendors are setting up, scooters are cutting through the frame, and the famous monument you came to photograph is already ringed with phones. Good travel photography starts in that kind of real scene, not in perfect conditions. The skill is noticing what matters, then making clear choices with the time, light, and budget you have.
Progress usually comes from small adjustments. Lower the camera instead of shooting from eye level. Wait for one clean gesture instead of taking twenty rushed frames. Shift a few feet to cut a bright sign from the background. Turn away from the main attraction and photograph the people, traffic, food stalls, or rituals around it. Those decisions shape a picture with context, not just proof that you were there.
Crowded destinations deserve a practical approach. Many guides assume you can wait for an empty view, but popular places rarely give you that luxury. Barriers, tour groups, and visual clutter are part of the experience. SRQ Photo School's travel photography discussion points to a gap in common advice here. Instead of fighting the crowd, use it with intent. A passerby can give scale. A queue can show demand. Repeated umbrellas, helmets, or market bags can add rhythm and tell the truth about how the area felt that day.
Ambition has its place too. Analysts at Growth Market Reports found that the photography workshop travel market was estimated at USD 1.62 billion in 2024 and projected to reach USD 3.22 billion by 2033, with Asia Pacific noted as the fastest-growing region. The useful takeaway for everyday travelers is simple. More people are willing to spend money learning how to see better because stronger photographs come from practice and intention, not expensive gear alone.
You do not need a workshop to start.
Pick one or two techniques from this guide and practice close to home first. Try golden hour in your neighborhood. Work on layering at a bus stop or weekend market. Use reflections in shop windows. Photograph details at a food stall with the camera or phone you already own. Street photography and environmental portraits ask for more patience and better people skills, so start slowly, ask permission when needed, and pay attention to local norms before raising the camera.
A useful habit is to leave each outing with three kinds of frames. One wide scene that sets context. One mid-range image that shows interaction. One close detail that carries texture or craft. That simple checklist keeps your work story-driven and helps you avoid spending the whole trip chasing only the obvious shot.
A fundamental shift happens after you stop asking for a prettier photo and start asking better questions. What does this place feel like at street level? What part of daily life deserves respect and attention? How can you show that clearly without getting in the way or spending more than your trip allows?
Answer those well, and travel photography becomes storytelling with purpose.
Travel Talk Today helps readers travel with more purpose, better judgment, and a sharper eye for what matters. Explore more practical guides at Travel Talk Today for affordable trip planning, cultural immersion ideas, and destination advice that supports more meaningful journeys.


