Your entire backpacking setup really hinges on what I call the "Core Three": your backpack, your shelter, and your sleep system. Don't think of these as just a list of items to buy. See them as a single, interconnected unit—your mobile base camp—that ultimately decides how comfortable, safe, and incredible your journey will be. Getting these three pieces right isn't just a good idea; it's the absolute first step to a successful adventure.
Build Your Mobile Base: The Core Three Essentials
Imagine your backpack, shelter, and sleep system as your own portable home. This isn't about grabbing any old bag or tent. It's about building a lightweight, reliable habitat that moves with you, shields you from the elements, and gives you a place to truly rest and recover. When you master these three essentials, a grueling trek transforms into an inspiring exploration.
It all starts with picking a backpack that feels less like a piece of luggage and more like an extension of your own body. The right pack becomes your partner on the trail, distributing weight so well that you forget it’s there and can focus on the world unfolding around you.
Choosing Your Backpack: The Ultimate Hauler
Your backpack is the literal foundation of your entire kit. The wrong one will dig into your shoulders, throw off your balance, and turn a dream trip into a miserable slog. Thankfully, modern pack design has come a long way, with a huge shift toward ultralight, ergonomic models that put comfort first without skimping on durability.
Just look at the numbers coming out of the backpacking community. The average base weight—that’s everything you carry minus food and water—has taken a nosedive. For many hardcore ultralight hikers, that number is now hovering around 12 pounds. That's a mind-blowing 40% reduction from the 20-pound averages we saw back in the early 2000s. This is mostly thanks to amazing new materials that allow for gear like the Durston Kakwa 55, a full-featured pack that weighs under 3 pounds.
Putting $200-$300 toward a quality pack is one of the smartest investments you can make. A good one will last you 5-10 years and can cut your long-term costs by 50% compared to cheaper models that always seem to fail you at the worst possible moment.
When it comes to size, let your trip length be your guide:
- Weekend Trips (1-3 nights): A 30-40 liter pack usually has all the room you need.
- Multi-Day Treks (3-5 nights): Step up to a 40-55 liter pack to comfortably fit more food and gear.
- Extended Expeditions (5+ nights): A 60L+ pack is a must for the volume required for long-term self-sufficiency.
Selecting Your Shelter: A Home Away From Home
Your shelter is your sanctuary from rain, wind, and buzzing insects. The best choice for you really depends on where you're going, the climate you expect, and your own personal comfort zone.
A tent gives you the most protection and privacy. It's a classic for a reason and a great choice for beginners or anyone heading into unpredictable weather. Modern freestanding tents are a breeze to set up and create a solid, reliable barrier.
For forested areas, a hammock is an amazing ultralight option that gets you off the cold, wet ground. When you pair it with a bug net and a rainfly (tarp), you create a cozy cocoon with a tiny footprint.
A bivvy sack (or bivy) is for the true minimalist. It's basically a waterproof, breathable shell for your sleeping bag, giving you just enough protection with the absolute lowest weight and bulk.
Your shelter isn't just about staying dry; it's about creating a psychological safe space. A reliable shelter allows your body and mind to fully recover overnight, preparing you for the next day's challenges.
Crafting Your Sleep System: The Key to Recovery
A good night's sleep out on the trail is completely non-negotiable. Your sleep system is a team of two crucial components working together: your sleeping bag and your sleeping pad.
For the sleeping bag, its temperature rating is the most important factor. A 20°F (-6°C) bag is a fantastic, versatile choice for three-season backpacking. You’ll also need to decide between down fill (which is lighter and more compressible but useless when wet) and synthetic fill (which is a bit bulkier but keeps you warm even in damp conditions).
Your sleeping pad does more than just cushion you from rocks and roots; its main job is to insulate you from the cold ground, which can suck the warmth right out of you. A pad’s insulating power is measured by its R-value. For most three-season adventures, an R-value between 2 and 4 is the sweet spot. Simple foam pads are bulletproof and cheap, while inflatable pads offer unmatched comfort and pack down incredibly small.
Figuring out how to combine all these elements is a huge part of the fun. You can see how it all comes together in our complete guide on how to plan a backpacking trip.
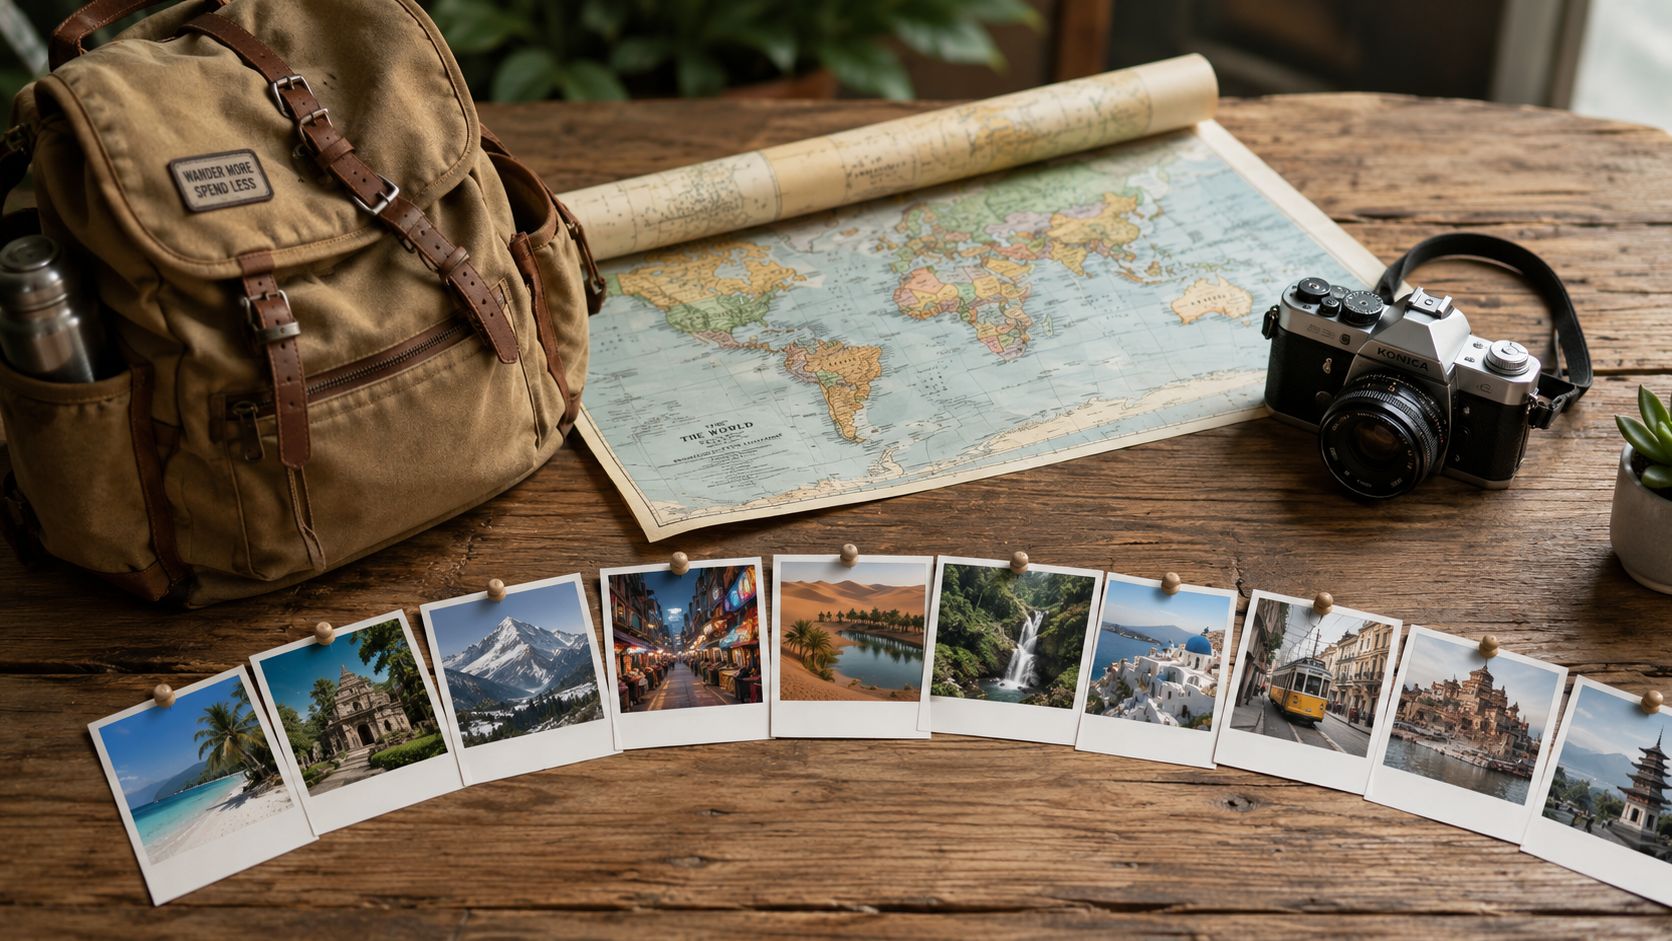
Master The Art Of A Versatile Travel Wardrobe
Let's talk about one of the biggest challenges for any backpacker: your wardrobe. Packing light isn’t about leaving necessities behind—it’s about choosing smarter. The real secret lies in thinking of your clothes not as separate items, but as one cohesive, adaptable system ready for anything the trail throws at you.
At the heart of this strategy is the art of layering. This is your personal climate control system, a simple yet powerful three-part approach that keeps you comfortable whether you're sweating under a jungle canopy or weathering a surprise mountain squall.
The Science Of Layering
Each layer in your kit has a very specific job to do. When you understand how they work together, you unlock the ability to stay warm, dry, and comfortable in almost any condition.
- Base Layer: Think of this as your second skin. Its one and only mission is to pull sweat away from your body, keeping you dry from the inside out. Forget cotton; we’re talking high-performance fabrics like merino wool or synthetics.
- Mid-Layer: This is your insulation. Its job is to trap the body heat you're already generating, creating a pocket of warm air. A packable down jacket, a synthetic puffy, or a trusty fleece pullover are perfect for this.
- Outer Layer (Shell): This is your shield against the elements. A good waterproof and windproof jacket protects your other layers (and you!) from rain, snow, and biting wind, ensuring the whole system functions properly.
When these three layers team up, you can tackle a shocking range of temperatures with just a handful of garments. You simply add or shed layers as you warm up or as the weather turns, maintaining that perfect sweet spot of comfort.
The Miracle Fabric Versus The Trail Enemy
When it comes to materials, one fabric truly reigns supreme for backpackers: merino wool. It's nature's own technical fabric. Merino wicks moisture, breathes like a dream, and is naturally odor-resistant, which means you can wear it for days on end without it getting funky. Best of all, it even keeps you warm when it gets wet.
And then there's cotton. While it’s fine for lounging at home, cotton is a backpacker's worst enemy. It’s like a sponge—it soaks up moisture and takes forever to dry. Once it’s wet, it actively sucks heat away from your body, which can be downright dangerous in cold weather. There's an old saying on the trail that every backpacker should live by: "cotton kills."
Remember, the goal of your travel wardrobe is total versatility. Every single item should have more than one job. That stylish merino wool shirt? It’s your hiking top, your pajama shirt, and your casual tee for a night out in a new city.
This philosophy of a core, functional system extends to your entire setup. Just as your clothing layers create a personal habitat, your main gear forms the foundation of your mobile home.
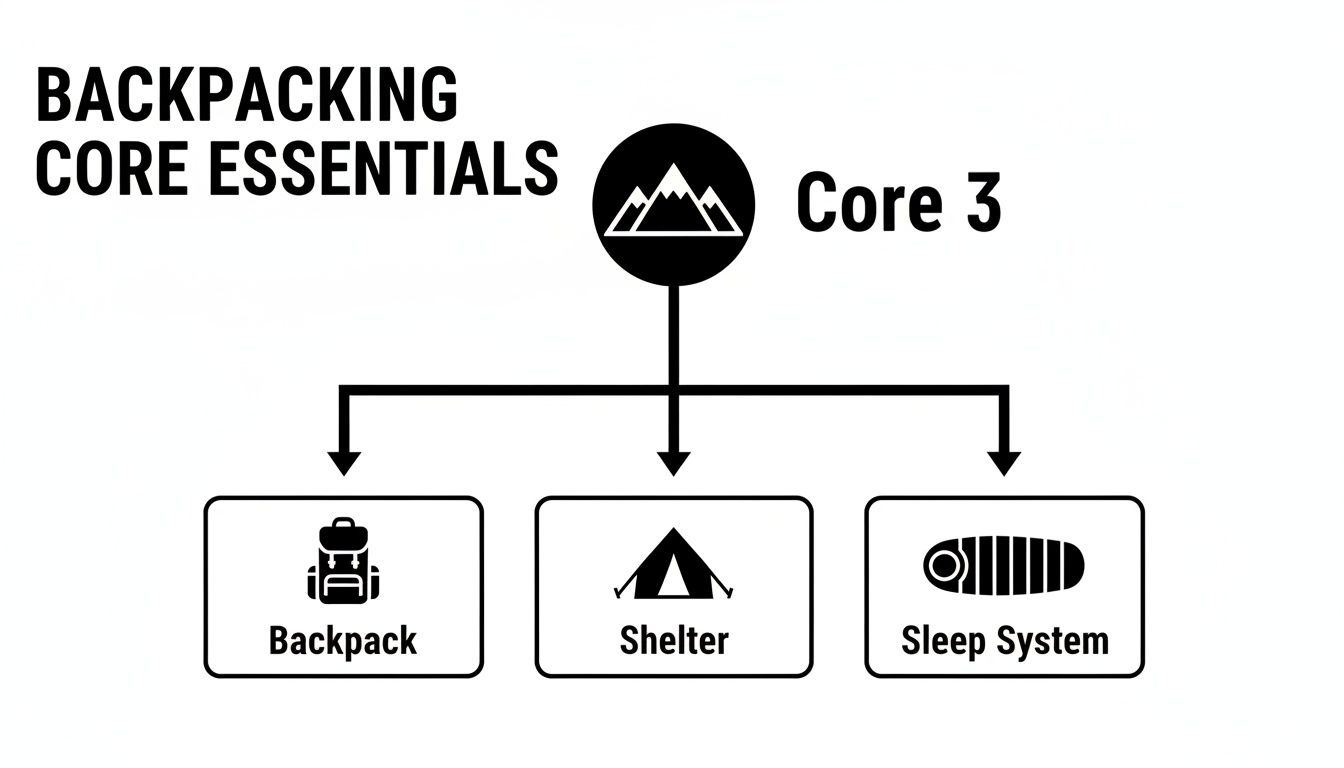
Think of your backpack, shelter, and sleep system as the 'Core 3'—the non-negotiable essentials that your versatile wardrobe travels within.
Building Your Capsule Wardrobe
A capsule wardrobe is a minimalist collection of essential clothing where every piece can be mixed and matched. It’s the perfect mindset for a backpacker, saving you precious space and weight.
Building your own layering system is all about adapting these core principles to your destination. The fundamental pieces remain the same, but you’ll want to adjust their weight and material based on the climate you're heading into.
Essential Layering System by Climate
| Layer | Tropical/Hot Climate | Temperate/Variable Climate | Cold/Mountain Climate |
|---|---|---|---|
| Base | 1-2 synthetic or merino t-shirts. | 2-3 synthetic/merino shirts (mix of short and long-sleeve). | 2 long-sleeve merino/synthetic base layers. Add thermal leggings. |
| Mid | A very light fleece or sun hoodie. | A mid-weight fleece or a light puffy jacket. | A mid-weight fleece and a warm down/synthetic puffy jacket. |
| Outer | A lightweight, breathable rain jacket. | A waterproof/breathable rain jacket. Optional rain pants. | A durable, fully waterproof/windproof shell jacket and rain pants. |
This table gives you a starting point. The beauty of this system is its flexibility—you can fine-tune it for any adventure on earth.
For a multi-week trip through a temperate climate, your list might look something like this:
- Tops: Two merino wool t-shirts, one long-sleeve merino base layer.
- Insulation: One packable down or synthetic puffy jacket.
- Bottoms: One pair of durable hiking pants (bonus if they convert to shorts).
- Outerwear: One waterproof/breathable rain jacket.
- Socks & Underwear: Three pairs of wool hiking socks and a few days' worth of synthetic underwear.
This simple list is surprisingly effective. Heading to Southeast Asia? Ditch the puffy for a light fleece and add swimwear. Trekking in Patagonia? Upgrade to a warmer mid-layer and add thermal bottoms. By choosing multi-use items, you build a powerful, feather-light wardrobe. If you're interested in making more eco-conscious gear choices, be sure to check out our complete guide on sustainable travel tips.
Fuel Your Adventure With The Right Kitchen And Hydration Gear
There’s a unique kind of freedom that comes with knowing you can take care of yourself in the wild. It’s the feeling of scooping water from a mountain stream and making it safe to drink, or cooking a hot meal with a jaw-dropping sunset as your backdrop. This self-sufficiency isn't just empowering; it frees you from the grid, saves money, and cuts down on single-use plastics. It all starts with the right gear for your trail kitchen.
Let’s get one thing straight right away: the first rule of backcountry water is to always treat it. That crystal-clear stream might look pure, but it can be a breeding ground for invisible troublemakers like Giardia or Cryptosporidium. One bad sip can ruin your entire trip, so a reliable water treatment system isn't just an item on your list—it’s your health insurance.
Choose Your Water Purification Method
Your best bet for water treatment really comes down to where you'll be hiking. Are you expecting clear, fast-moving rivers, or will you be pulling from silty ponds? Each method comes with its own quirks.
- Squeeze Filters: These are incredibly popular for a reason. Systems like the Sawyer Squeeze are lightweight, fast, and physically remove the bad stuff. They’re a fantastic choice for solo hikers or pairs, but they can clog if your water source is murky and they're vulnerable to freezing, which can crack the filter and render it useless.
- Purifier Bottles: An all-in-one marvel, bottles like the Grayl GeoPress filter and purify your water with one simple press. They’re super convenient and even take care of viruses, but this convenience comes at the cost of extra weight and a filter that will eventually need replacing.
- UV Pens: These little wands use ultraviolet light to zap pathogens into oblivion. A UV pen is featherlight and won't change how your water tastes, but it relies on batteries and only works its magic in clear water—any sediment can shield the microbes from the light.
- Chemical Tablets: Nothing is lighter or more foolproof than iodine or chlorine dioxide tablets. They are the ultimate backup plan, killing everything, including viruses. The tradeoff? You'll have to wait anywhere from 30 minutes to 4 hours for them to work, and some people notice a slight chemical taste.
The smartest play is to carry two forms of water treatment. A primary filter for everyday use, and a tiny bottle of chemical tablets tucked away as an ultralight, fail-safe backup. That little bit of redundancy buys you complete peace of mind.
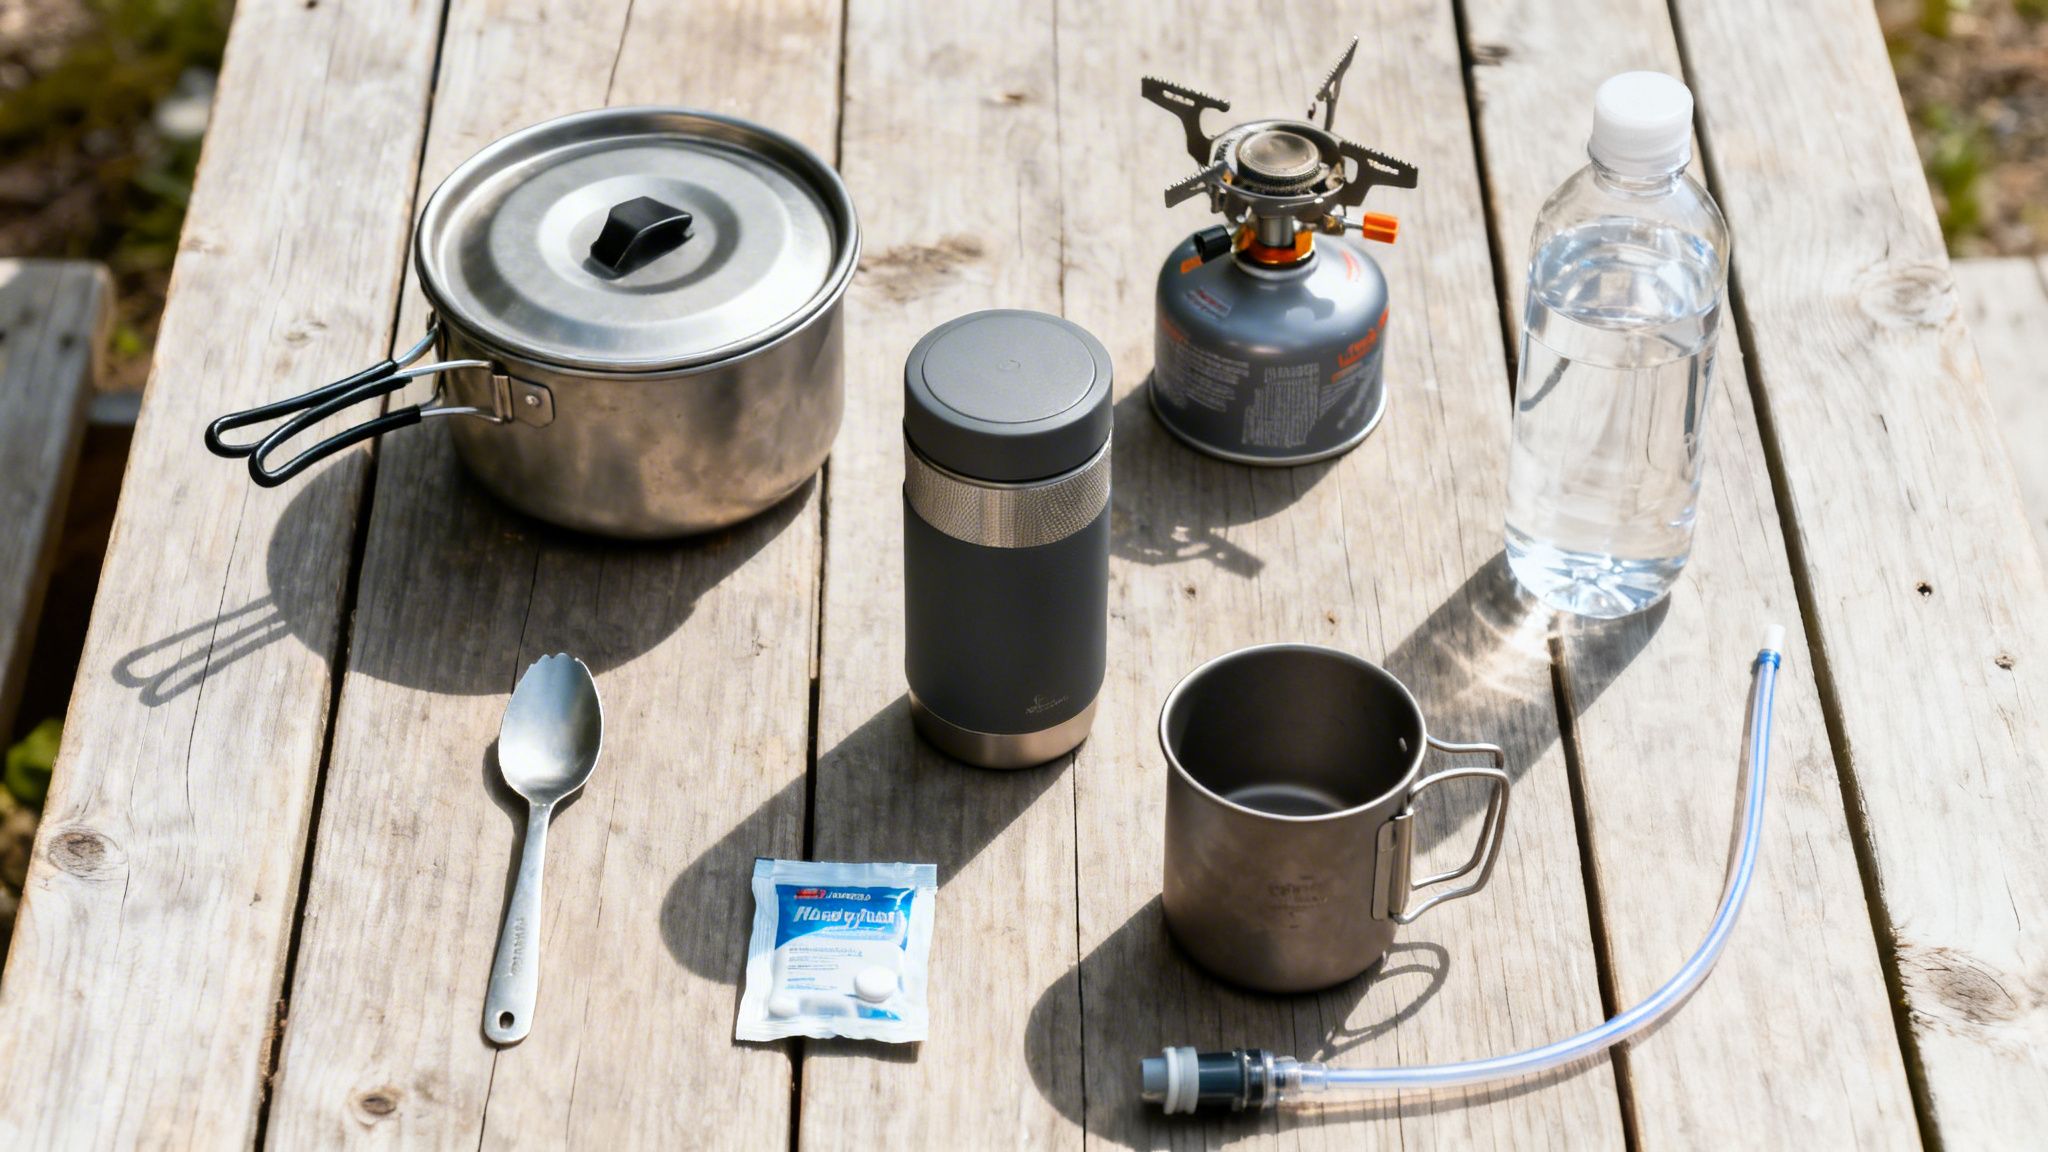
Assemble Your Backcountry Kitchen
After a grueling day on the trail, a hot meal feels less like a luxury and more like a necessity. Your trail kitchen can be anything you want it to be, from a full-on cooking setup to a simple, no-cook system. The goal is to find your personal sweet spot between weight, convenience, and that soul-warming comfort only a hot meal can provide.
Your stove is the heart of it all. Canister stoves are the easiest to use—just screw one onto a fuel canister and you're good to go. They're light, clean, and boil water in a flash. On the other hand, liquid fuel stoves run on refillable white gas, perform better in freezing temperatures, but do require a bit of priming and cleaning.
For most backpackers, a simple canister stove, a small titanium pot, a long-handled spork, and an insulated mug is the perfect setup. It’s all you need to boil water for dehydrated meals, a morning coffee, or a calming cup of tea. If this is your first foray into backpacking, it's worth reviewing some backpacking tips for beginners before you start buying gear.
You can also go all-in on shedding weight with a no-cook strategy. This means packing foods that are ready to eat right out of your pack, like tortillas with peanut butter, jerky, hard cheeses, and protein bars. You’ll miss the ritual of a hot dinner, but the weight you save can make a huge difference, especially on shorter trips. At the end of the day, your food strategy is deeply personal—a blend of pure function and the simple joy of a meal earned under the stars.
Pack For Peace Of Mind: Your Health And Safety Essentials
Alright, let's talk about the gear that goes beyond keeping you warm or dry. This is the stuff that gives you something even more precious out there on the road: total peace of mind. Your health and safety are the most important things you'll ever pack, because preparing for the unexpected is what gives you the freedom to explore with confidence.
This isn't about planning for disaster. It's about being smart and empowered. From a first-aid kit that actually helps to simple tools that make you feel secure, these items are your silent partners on any adventure, always ready when you need them.
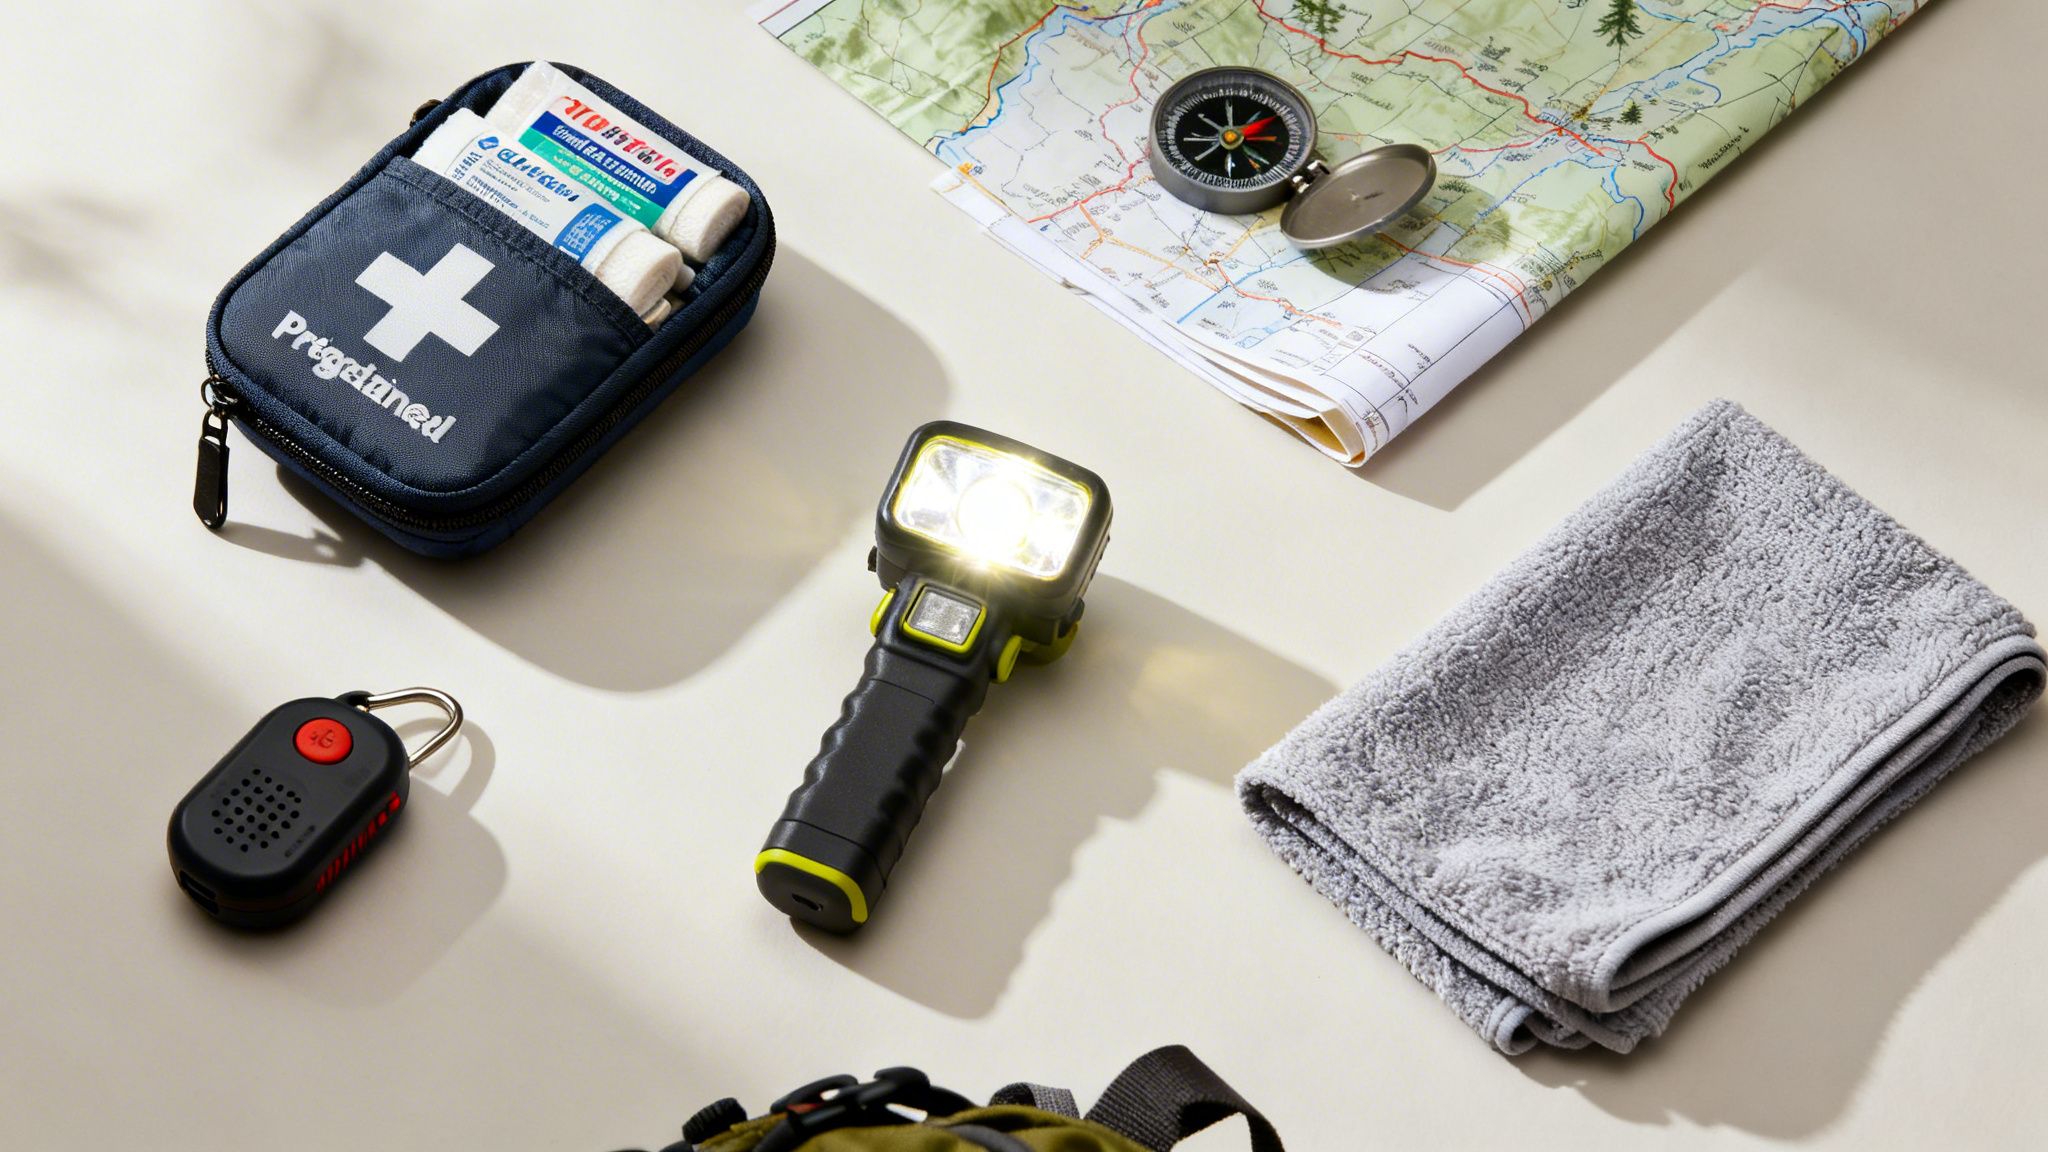
Build A First-Aid Kit That Actually Works
Sure, you can grab a pre-made first-aid kit off the shelf, but a truly great one is personal. Think of it less as a generic box of supplies and more as your own trail-side medical cabinet, stocked specifically for the journey you’re on.
Believe it or not, the most common trail injury isn’t some dramatic fall—it's the humble blister. Getting your foot care right is everything. Before you even think about leaving, pack specialized blister bandages like moleskin or Compeed. These create a cushioned second skin that can stop a nagging hotspot from turning into a trip-ruining wound.
Beyond blisters, a solid kit should cover the basics:
- Wound Management: Antiseptic wipes, a variety of bandages, sterile gauze, and medical tape for patching up cuts and scrapes.
- Pain & Ailments: Ibuprofen for sore muscles, antihistamines for surprise allergic reactions, and of course, any personal medications you can't go without.
- Tools: A small pair of tweezers is invaluable for splinters and ticks, and a few safety pins always come in handy.
Your first-aid kit's number one job is to solve small problems before they become big ones. A single bandage or a dose of pain reliever can be the difference between a minor hiccup and a major ordeal.
Trail Hygiene With A Minimalist Mindset
Staying clean on your travels is about more than just feeling fresh—it’s about staying healthy. The challenge is doing it without hauling a whole bathroom cabinet on your back. The secret? Embrace solid, multi-use products that save space, prevent spills, and are kinder to the planet.
Solid toiletries are a backpacker's dream come true. A single bar of biodegradable soap can wash your body, hair, and even your clothes. Solid toothpaste tabs, deodorant sticks, and shampoo bars completely eliminate the risk of a gooey explosion inside your pack.
Round out your minimalist kit with just a few more items:
- A quick-dry microfiber towel that can pack down to the size of a fist.
- A small bottle of hand sanitizer for quick clean-ups before you eat.
- A lightweight trowel for digging catholes to properly dispose of human waste—this is a non-negotiable part of practicing Leave No Trace principles.
By keeping your hygiene kit simple, you carry less weight and leave a lighter footprint on the beautiful places you’ve come to see. This is also where having a good insurance plan offers a safety net, covering any medical needs that go beyond what your first-aid kit can handle. For help choosing a policy, our guide on travel insurance comparison is a great place to start.
Personal Safety Tools And Strategies
Your personal safety is paramount, especially when you’re exploring solo or navigating unfamiliar territory. The goal here isn’t to be fearful, but to be prepared with simple, effective tools that boost your confidence and let you move through the world feeling secure.
A powerful headlamp with extra batteries is an absolute must. It’s your key to finding your way on a dark trail, setting up your tent after sunset, or just navigating a guesthouse bathroom at 2 AM. Most importantly, it keeps your hands free.
For those moments when you might need to get someone’s attention, a high-decibel safety alarm or a simple whistle is incredibly effective. It’s tiny, weighs almost nothing, and can be heard from a huge distance, acting as a powerful alert. And for those nights in a questionable hostel? A simple rubber door stop is a cheap, brilliant, and low-tech way to add an extra layer of security to your room.
Finally, know where you are. Offline map apps are fantastic, but phones die. Always carry a physical map and compass and, crucially, know the basics of how to use them. This timeless skill is your ultimate backup plan, ensuring you’re never truly lost. It’s the ultimate safety net for any adventure.
Stay Connected And Prepared With Modern Tech And Tools
Let’s talk about tech. Packing the right gear isn't about being glued to a screen; it’s about being smart. A few key pieces of technology and some surprisingly simple tools can be the difference between a frustrating snag and a smooth, unforgettable adventure. Think of this gear as your behind-the-scenes support crew, making sure you stay safe, solve problems on the fly, and capture every amazing moment.
The most critical piece of modern trail gear isn't some flashy gadget—it's power. A reliable power bank is absolutely essential. It’s the lifeline that keeps your phone, camera, and navigation running when you're miles from the nearest outlet. Consider it your personal energy reserve, ready to go when that map app starts eating your battery on a long bus ride.
Powering Your Adventure
If you’re crossing borders, a universal adapter is just as vital. It’s the simple, brilliant key that lets you plug in and recharge anywhere on the planet, from a buzzing hostel in Bangkok to a quiet café in Lima. Without one, your power bank and all your other electronics are just dead weight.
Beyond keeping things charged, a few other items have earned their place in my pack over and over again.
- Noise-Canceling Earbuds: For anyone who isn't a world-champion sleeper, these are a lifesaver. They create your own little bubble of peace in a loud 12-bed dorm or on a rattling overnight train, helping you get the deep rest you need to be ready for the next day.
- E-Reader: I love real books, but they're heavy. An e-reader gives you access to an entire library for the weight of a single thin paperback, providing endless entertainment for long layovers or quiet evenings.
- Headlamp: We’ve already mentioned this as a safety must-have, but it’s a core piece of tech, too. A good headlamp keeps your hands free for everything from cooking dinner after sunset to digging through your pack in a dark dorm.
Modern technology on the trail isn't about distraction; it's about empowerment. The right tech keeps you safe, connected to loved ones, and prepared for the unexpected, freeing you to immerse yourself fully in the experience.
The Low-Tech Tools That Save The Day
Not every problem needs a digital solution. In fact, some of the most valuable items on your backpacking checklist are brilliantly simple and have saved me more times than I can count.
Duct tape is a legend for a reason. Here’s a pro tip: instead of packing the whole bulky roll, just wrap a few feet of it tightly around your water bottle or trekking pole. I’ve used it to patch a hole in my tent, repair a torn rain jacket, and even hold a fraying backpack strap together. It's the ultimate quick fix.
A handful of other non-digital items can also bring a little order to the beautiful chaos of your pack and protect your most important gear.
- Packing Cubes: These are the secret to an organized backpack, period. They let you group your clothes and gear into compartments, so you can find that one clean shirt without exploding your bag’s entire contents onto the hostel floor.
- Dry Bags: An absolute must for protecting your passport, electronics, and sleeping bag from a sudden downpour or a leaky water bottle. A lightweight dry bag is cheap insurance against water damage that can instantly ruin your trip.
- Journal and Pen: Your phone can capture a picture, but a journal captures the feeling. It’s a space for thoughts, sketches, and funny quotes—the details technology can’t record. It will become one of your most priceless souvenirs.
This collection of gear, both high-tech and wonderfully simple, works in the background to handle the small stuff so you can focus on the big adventure. And if you’re looking for the right apps to load onto your phone, you can learn more about the best travel apps in our dedicated guide.
Your Customizable Backpacking Essentials Checklist
Alright, we’ve talked a lot about the theory—the art of packing light and smart. Now, let’s get our hands dirty and turn all that good thinking into a real-world plan. I’ve put everything we've covered into a downloadable backpacking essentials checklist you can save right to your phone or print out.
This isn’t some random list I pulled off the internet. It’s the culmination of years of experience, refined after countless trips where I definitely overpacked (or worse, under-packed). We’ve created three different versions, because a weekend jaunt is a world away from a month-long trek. This is about giving you a head start with a template that actually fits the trip you’re planning.
Find Your Perfect Checklist
Every adventure has its own rhythm, and your packing list needs to match it. Think of these not just as lists, but as conversation starters for your trip—packed with little reminders and organized by the very principles we’ve just gone over.
The Weekend Warrior (1-3 Day Trips): Heading out for a quick reset? This is your list. It’s lean, mean, and focused on the absolute must-haves for short trips, so you can pack light and move fast without ever feeling unprepared.
The Long-Haul Adventurer (Multi-Week Journeys): For those bigger adventures that span weeks or even months, this is your bible. It accounts for changing weather, long-term hygiene, and gear that needs to go the distance. It’s your master plan for truly living out of your pack.
The Specialized Explorer (Modular Add-Ons): This one is my personal favorite. It starts with a solid foundation and then lets you bolt on "modules" for specific needs—think alpine trekking, a humid jungle expedition, or even a stint of urban backpacking.
Think of these checklists as your final sanity check. They’re that last moment of calm before you walk out the door, giving you the confidence that comes from knowing you have everything you need and absolutely nothing you don't.
Each checklist is broken down into clear sections with simple checkboxes, and I’ve even left space for you to scribble in your own notes. The best packing list is always the one you make your own. They’re designed to reinforce what we’ve learned, making sure every single item you carry has earned its place.
This is your chance to pack with purpose and leave the “what if I forgot…?” anxiety behind. Grab the download that feels right for your next trip, and get ready to step into the wild feeling capable, confident, and ready for whatever comes your way.
You’ve got questions, and that’s a great thing. It means you’re already shifting from a dreamer to a doer, thinking through the details that separate a good trip from a truly incredible one. Getting your gear dialed in is where nervous energy transforms into pure, unadulterated excitement.
Let's tackle some of the biggest questions that pop up when you're staring at an empty backpack, wondering where to even begin.
Before we dive deep, here’s a quick-glance table to answer your most pressing questions right now.
Quick Answers to Top Backpacking Questions
| Question | Quick Answer & Key Takeaway |
|---|---|
| How heavy should my pack be? | Aim for a total pack weight that’s no more than 20% of your body weight. Your base weight (pack minus food/water) should ideally be under 20 pounds. |
| What size backpack do I need? | A 30-50 liter pack is perfect for weekends. For multi-day trips, a 50-70 liter pack is the versatile sweet spot. Go 70+ liters only for long expeditions. |
| Can I navigate with just my phone? | Use your phone and apps like Gaia GPS, but always carry a physical map and compass as a non-negotiable backup. Tech can and does fail. |
Now, let's explore the thinking behind these answers.
How Heavy Should My Backpack Be?
Ah, the million-dollar question. The honest answer is as light as you can possibly make it without compromising your safety or sanity. A happy hiker is one who isn't groaning under the weight of their own pack.
A great target for your base weight—that's everything in your pack except consumables like food, water, and fuel—is under 20 pounds (9 kg). Some ultralight pros get this down below 15 pounds (6.8 kg), but don't obsess over that number when you're starting out.
The most helpful rule of thumb is this: your fully loaded pack should never weigh more than 20% of your body weight. So, if you weigh 150 pounds, your max pack weight should hover around 30 pounds. This isn't law, but it's a fantastic guideline that will save your back and knees.
What Is The Best Backpack Size To Get?
The wall of backpacks at an gear shop can be intimidating, but we can simplify this. It all comes down to how long you plan to be out on the trail.
- Weekend Jaunts (1-3 nights): A 30-50 liter pack is your best friend here. It’s big enough for the essentials but small enough to stop you from packing your fears.
- The Classic Trek (3-7 nights): Step up to a 50-70 liter pack. This is the real workhorse of the backpacking world, giving you space for more food and a few extra comforts.
- Epic Expeditions (7+ nights): For those long hauls, a 70+ liter pack is what you'll need to carry a week's worth of food or specialized gear for winter conditions.
Your backpack is like a snail's shell—it should be just big enough to hold everything you need to survive and thrive. Too big, and you'll be tempted to fill the empty space with unnecessary weight.
Can I Use My Phone For Navigation?
Yes! And you absolutely should. Modern apps like Gaia GPS and AllTrails are game-changers, turning your phone into a powerful GPS with offline maps. They are a staple of modern backpacking.
But—and this is a big one—you can never rely on your phone alone. Electronics are fickle. Batteries die, screens shatter, and a cold snap can sap power in minutes. Your non-negotiable backup is a physical map of the area and a compass. Just as important, know how to use them. That simple, analog skill set is your ultimate lifeline when technology fails.
At Travel Talk Today, we believe that smart preparation is the key to unlocking deeper, more meaningful adventures. For more expert tips, personalized checklists, and destination guides that help you travel with confidence, visit our collection of packing resources.