You're probably staring at a packing list right now, wondering which items are necessary and which ones are expensive overkill. Antarctica does that to people. It's one of the most extraordinary trips on earth, and it also makes sensible travelers second-guess every jacket, glove, sock, and base layer they own.
The problem with most advice on clothing for Antarctica is that it swings to extremes. Some lists read like you need a polar science budget. Others are so generic they leave out the parts that make or break your comfort, like managing sweat, dealing with wet Zodiac rides, or trying to use a camera without exposing your fingers to the wind.
Good Antarctic clothing isn't about looking rugged. It's about staying dry, warm, and mobile enough to enjoy what you came for. You want to watch penguins, step onto blue-white ice, and stand on deck in silence without being distracted by numb toes or clammy layers. That takes a system, not a shopping spree.
Your First Step Onto the Ice
The first landing surprises almost everyone. The air feels cleaner than you expected. The light is sharper. The scale is wrong in the best possible way. Ice cliffs look close until you realize they're enormous, and the silence has a weight to it that most places on earth don't.
Then the practical side kicks in.
You climb out of a Zodiac, feel cold spray on your outerwear, and realize this trip rewards preparation more than bravado. The travelers who look most comfortable usually aren't wearing the most expensive gear. They're the ones who dressed with purpose, left room to adjust, and understood that moisture is often a bigger problem than cold itself.
Practical rule: If your clothing traps sweat, Antarctica will punish that mistake faster than almost any other destination.
That's the mindset to carry into your packing. Not fear. Not gear obsession. Just a calm understanding that the right setup lets you forget about your setup.
What matters most on this trip
A smart clothing plan for Antarctica comes down to a few realities:
- You'll face changing conditions: A ship deck, a shore landing, and a Zodiac cruise don't feel the same.
- You need to stay dry: Wind and splashing water can turn a minor clothing mistake into a miserable afternoon.
- Bulky gear eats luggage space fast: Budget travelers need to think about weight and multi-use pieces.
- Photographers need dexterity: Warm hands are one thing. Warm hands that can still adjust a lens are another.
The good news is that none of this requires guesswork. Once you understand the layering logic and where to spend money versus where to rent, packing gets much simpler.
The Unbreakable Rule of Antarctic Layering
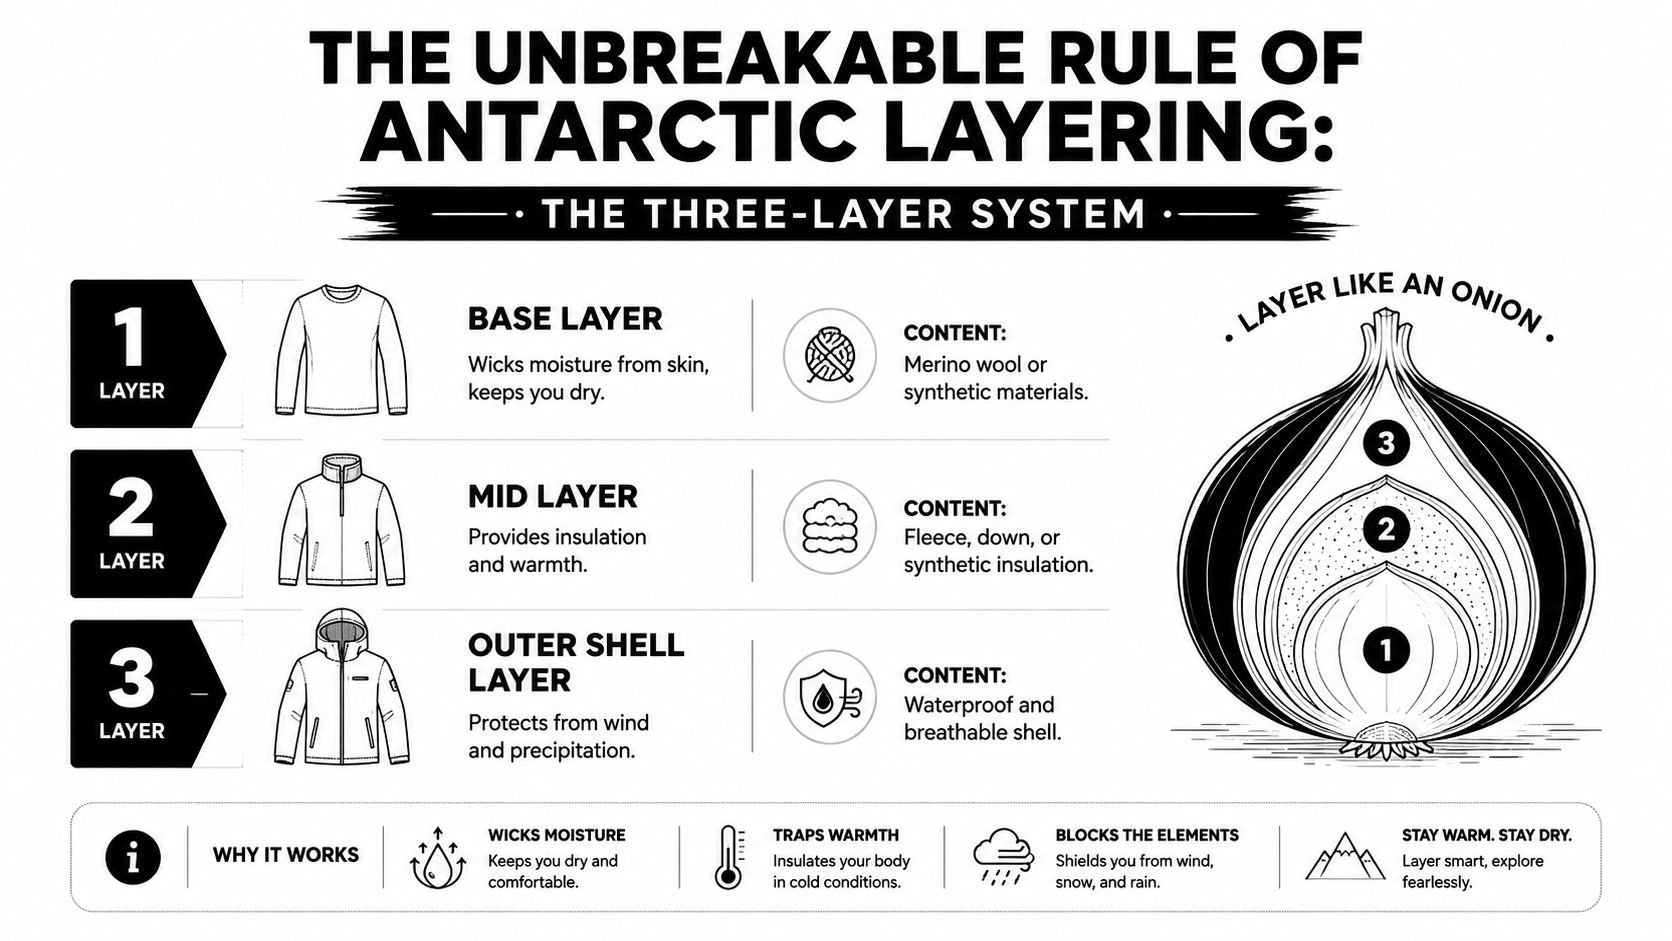
Layering decides whether you stay comfortable or spend the day managing sweat, cold spots, and damp cuffs. In Antarctica, the mistake I see first-time travelers make most often is dressing for the air temperature alone. The bigger problem is trapped moisture. Once your base layers get wet, even a good parka starts losing the battle.
Start with the base layer
Your base layer has one job. Keep sweat off your skin.
That rules out cotton. It hangs onto moisture, dries slowly, and turns a small mistake into a long cold afternoon. Merino and synthetics both work well. Merino feels better over multiple days and smells less. Synthetic usually costs less, dries fast, and is often the smarter buy if you already own hiking or ski pieces.
You do not need an expensive full merino set for every day of the trip. For a typical expedition, two or three good base layer sets are usually enough if you rotate them and let pieces air out properly on the ship. Travelers trying to keep costs down should put money into fit and fabric, not branding.
If you want pieces you can reuse after the trip, focus on quick-dry travel clothes that work across climates instead of buying single-purpose polar tops.
Build warmth without turning bulky
The middle layers create insulation by holding warm air, but they only work if you can still move and vent heat before you overheat. That is the trade-off. More loft gives you more warmth. Too much bulk makes it harder to climb in and out of Zodiacs, sit comfortably, or work a camera without feeling wrapped in upholstery.
For budget-conscious travelers, fleece is usually the best value in the whole system. It is cheaper than premium insulated pieces, dries quickly, and keeps working even if it picks up some moisture. A simple fleece jacket or quarter-zip under a shell covers a lot of conditions. Add a light insulated vest or jacket only if you run cold.
Photographers should be stricter about bulk than other travelers. A huge puffy mid-layer can make it awkward to raise a camera, twist for a shot from the rail, or reach batteries and lens cloths quickly. A trimmer fleece plus a roomy shell is often easier to work in than one very thick insulating piece.
A practical setup looks like this:
- Base: merino or synthetic thermal top and bottom
- Mid-layer: fleece jacket, grid fleece, or wool sweater
- Extra warmth if needed: light insulated vest or jacket
- Outer layer: waterproof, windproof shell with enough room to layer underneath
Remove a layer early. Waiting until you feel sweaty is late.
Finish with a shell that actually blocks weather
Your shell is there to stop wind, spray, and wet snow from reaching everything underneath. If it is only water-resistant, it is not doing the full job. Antarctica exposes weak outerwear fast, especially during landings and on windy deck crossings.
This is also where many travelers overspend. You do not need a top-tier mountaineering shell if you are joining a standard expedition cruise and your operator provides a proper expedition parka. You do need a jacket and outer layer that block wind reliably, shed water, and fit over your insulation without squeezing it flat. Compressed layers lose warmth.
What works in practice
The best clothing systems are usually boring. They fit well, dry fast, and let you adjust quickly.
- Usually worth using: merino or synthetic base layers, fleece mid-layers, breathable waterproof shells, and clothing with enough room to move
- Usually worth skipping: cotton shirts, tight fashion thermals, heavy parkas that leave no room for layering, and cheap shells that wet out early
- Often the smartest budget move: use base and mid-layers you already own, then rent the specialized expedition outerwear if your operator offers it
A good Antarctic layering system is not about wearing the most gear. It is about staying dry, keeping your options open, and making sure your clothing still works when you need both warmth and dexterity. That last part matters even more if you are trying to come home with sharp photos instead of numb fingers.
Protecting Your Hands Feet and Head
Cold shows up in your extremities first. You feel it when you kneel in a wet Zodiac, pull a camera from your jacket, or stand still on deck longer than planned. Hands, feet, and head are where a good packing plan saves a trip, and where expensive mistakes are easy to make.
Feet first
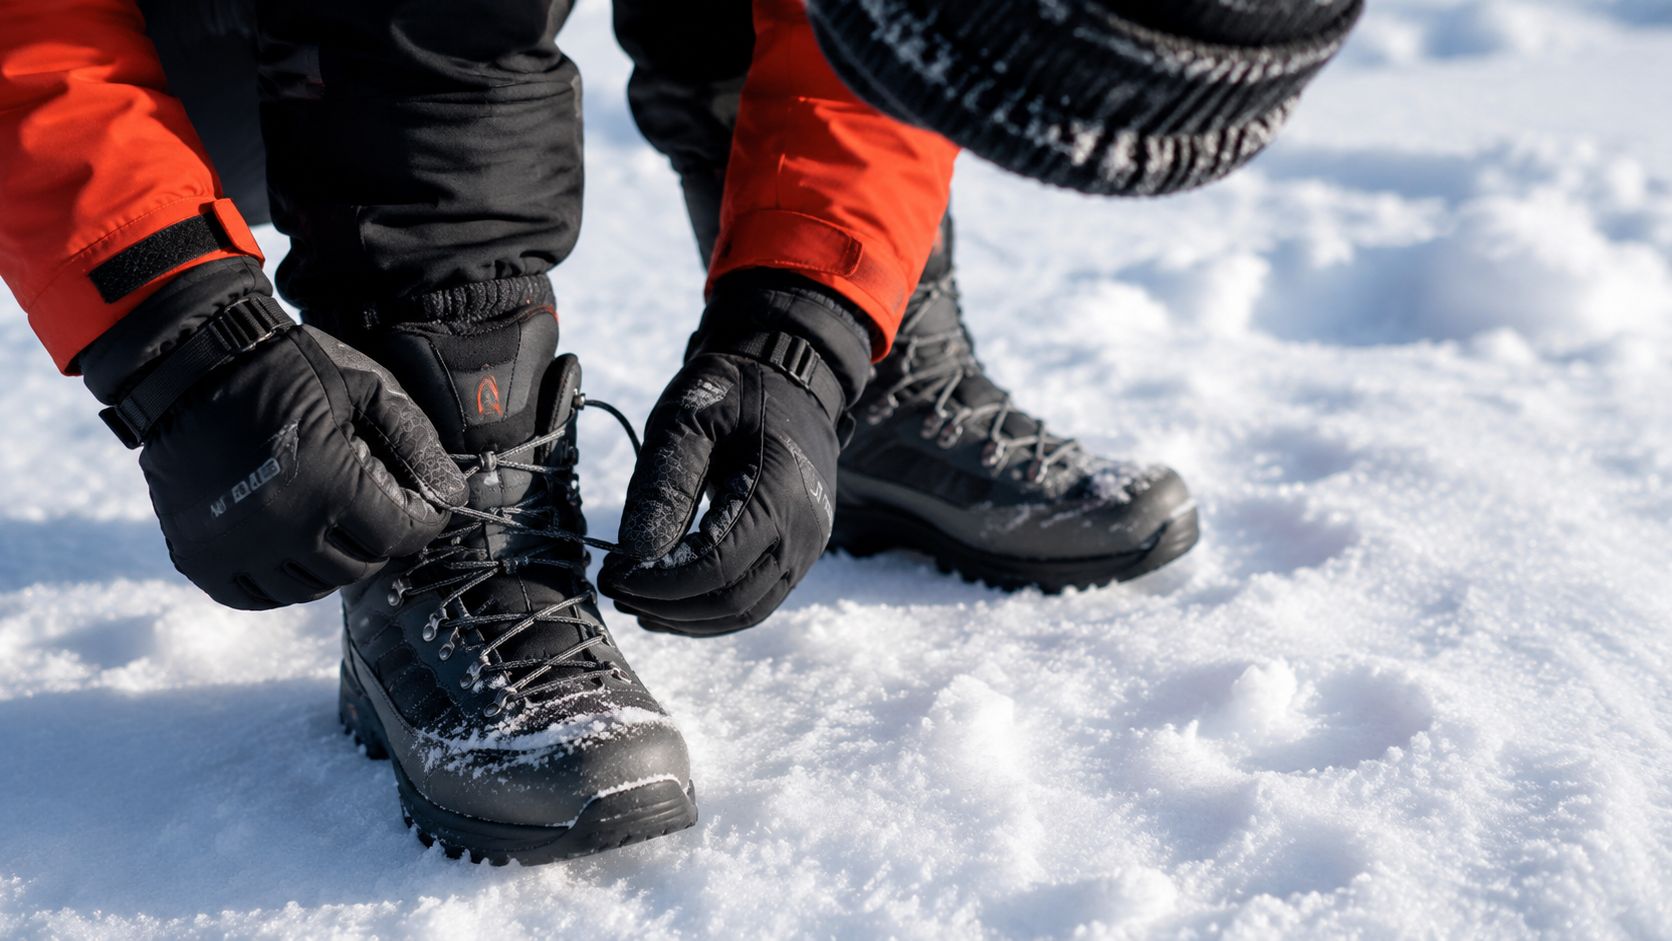
For Antarctica, footwear has one job above all else. Keep water out. Warmth matters, but wet feet end the argument fast.
Most expedition operators want fully waterproof, knee-high rubber boots for a reason, as noted earlier from the Quark Expeditions packing checklist. Zodiac landings, slushy shore edges, and spray over the side are normal conditions, not rare ones. If your trip includes loaner boots, use them unless your own pair already fits well and has proven itself in cold, wet conditions. Renting here often makes more sense than buying a premium pair you may never use again.
Socks matter almost as much as boots. A thin liner sock under a heavier wool sock works well because it cuts friction and gives you more ways to adjust warmth. Pack spare thick pairs. Boots get damp, cabins dry slowly, and changing into dry socks can reset a miserable afternoon.
A practical foot system looks like this:
- Thin liner socks: reduce rubbing and help manage moisture
- Heavy wool or wool-blend socks: add insulation without feeling clammy
- Knee-high waterproof boots: protect against splash, slush, and shallow water at landings
- Extra sock pairs: worth the bag space if one set gets wet
If you are building your kit from scratch, a broader backpacking essentials checklist helps sort out which cold-weather basics can serve you on future trips too.
Hands need a working system
Hands are where photographers usually suffer first. You need warmth, but you also need enough control to change settings, wipe a lens, or hold a railing safely. One thick ski glove sounds efficient until you try to use small camera buttons with numb fingers.
The better setup is layered. Wear thin liner gloves for dexterity, then add insulated gloves or mittens over them. If your trip is likely to include wet Zodiac rides or blowing snow, a waterproof shell mitten over the top is worth carrying. It looks like overkill in your cabin. It feels smart after twenty minutes in wind and spray.
For photography, I prefer liner gloves that let me work the camera briefly, then a mitten I can pull back on immediately between shots. That setup is cheaper than buying specialized expedition photo gloves, and it usually works better.
Don't leave gaps at the head and neck
A warm hat alone is often not enough in Antarctic wind. The problem is not just heat loss from the top of your head. It is the exposed strip at the neck, the cheek that catches spray, and the gap around the collar when you turn to look for whales.
Cool Antarctica notes that full cold-weather protection aims for no exposed skin, using items like hoods, balaclavas, and eye protection to close those openings in an Antarctic clothing guide. That standard is useful even on a cruise. A beanie, a neck gaiter or balaclava, and a hood that cinches down give you far better protection than any one item on its own.
Sun protection belongs here too. Antarctic light reflects hard off snow, ice, and water. Bring sunglasses or goggles that block glare well, and pack sunscreen you are sure to reapply. People remember the cold. They forget the burn until later.
Dressing for the Moment from Ship Deck to Kayak
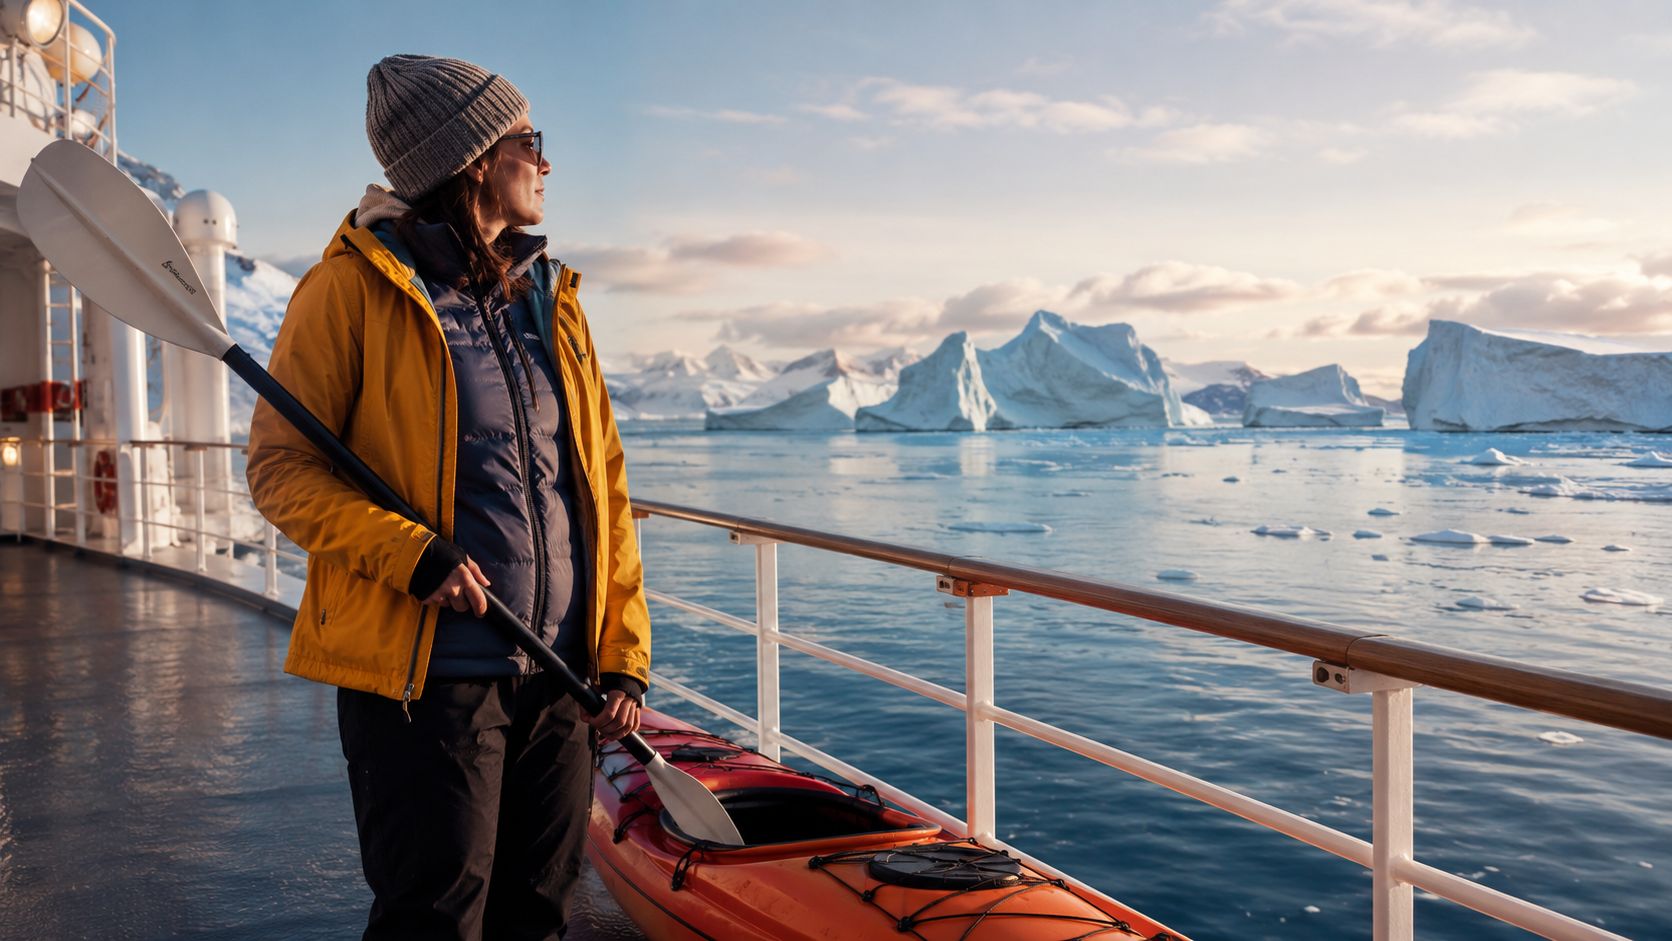
Antarctica doesn't ask for one outfit. It asks for a clothing system you can tune several times a day. The setup that feels perfect on a windy deck can feel too warm during a shore walk. What works for a Zodiac cruise may not be what you want while handling a camera or sitting low in a kayak.
Ship deck versus shore landing
On deck, wind is often the primary problem. You may not be moving much, which means your insulation matters more. A warm hat, your outer shell, and insulated gloves or mittens often make the difference between enjoying the view and retreating indoors too early.
On land, movement changes the equation. Walking generates heat. If you start slightly cool and then warm up, that's usually better than starting overdressed and sweating into your base layers. The travelers who stay comfortable are the ones who unzip, vent, or remove a layer before moisture builds.
For kayaking and Zodiac rides, waterproof protection becomes essential. Splashing water changes everything. Clothing that seemed “probably fine” in dry cold stops being fine when it gets wet.
The overlooked problem for photographers
Photography is where generic packing lists usually fall apart. Adventurous Kate points out a real gap here. Generic Antarctica packing advice often fails to explain how to use a camera in -20°C conditions, even though photographers need specific solutions like liner gloves with zipper access or modular systems that let them work without exposing themselves to the wind in this photography-focused packing discussion.
That matters because camera use creates a clothing conflict. Warmest isn't always most usable.
Here's what tends to work best for photographers on a budget:
- Wear liner gloves all the time: They give you a thin operating layer when you need to peel back a mitten quickly.
- Use mittens as the warmth layer, not the working layer: Take them off briefly, then get them back on fast.
- Choose jackets with accessible chest or side pockets: You don't want to open your whole front every time you need a battery or lens cloth.
- Avoid over-bulky cuffs: Thick cuffs can interfere with camera straps, wrist movement, and button access.
- Keep your shooting routine simple: Fewer lens swaps means less time with exposed hands.
If you're trying to travel with both cold-weather gear and camera equipment, this guide on how to pack light can help trim the rest of your bag so your photography kit gets the space it needs.
Photographers stay warmer when they shorten every exposed-hand task. Pre-set what you can before leaving the ship.
What to wear by activity
A simple way to think about activity-specific clothing for Antarctica:
| Activity | Clothing priority | Common mistake |
|---|---|---|
| Ship deck wildlife watching | Wind protection and insulation | Going out in indoor layers and underestimating wind |
| Shore landing | Adjustable layering and good mobility | Wearing too much and sweating while walking |
| Zodiac cruise | Waterproof shell and hand protection | Treating it like a dry sightseeing ride |
| Kayaking | Reliable waterproof outerwear and secure layering | Bulky clothing that restricts paddling or camera handling |
| Photography stops | Dexterity and fast access to pockets | One giant pair of gloves with no backup liner |
The key is to dress for what you'll be doing, not just for the temperature.
The Smart Traveler's Dilemma Rent or Buy
You feel the gear bill before you feel the Antarctic cold. A lot of first-time travelers spend too much on the wrong items, usually because bulky outerwear looks like the obvious place to prepare. In practice, that is where a budget often gets wasted.
The smarter approach is simple. Buy the pieces that need to fit your body well and that you will use again. Rent the large, specialized items that take over your luggage and may never leave the closet after this trip.
When renting makes more sense
Renting usually wins for parkas, waterproof shell pants, and Antarctic landing boots. Those are the items that eat suitcase space, cost a lot up front, and have limited value once you are back home unless you already live or travel in very cold, wet conditions.
It also makes sense for travelers who already own a decent layering system. If you have merino base layers, a fleece, wool socks, and a warm hat, you are already most of the way there. You do not need to buy a full polar wardrobe just to fill the gaps.
There is another practical benefit. Rental gear lets you protect cash for the parts of the trip that are harder to cut later, such as flights, insurance, and hotel nights before embarkation. If you are trimming the wider trip budget, these money-saving travel strategies for big trips are worth applying before you start buying cold-weather gear.
When buying is worth it
Buy base layers, socks, glove liners, and mid-layers. These sit close to the skin, and comfort matters more here than brand prestige. A well-fitting merino top from a mid-range label will do more for your day than an expensive parka you barely need after the trip.
Fit also matters for photographers. Gloves are the clearest example. Rental gloves are often warm enough, but warmth alone is not the full test if you need to adjust shutter speed, swap batteries, or wipe sea spray off a lens. I would rather save money on a rented parka and spend it on a hand system I trust.
Buy if your sizing is hard to match, too. Travelers with very small, very large, or awkward in-between fits often lose time and comfort trying to make rental gear work.
Spend your money on personal layers and dexterity. Save it on bulk.
Antarctic gear rent versus buy decision guide
| Item | Best for Renting If... | Best for Buying If... | Cost Pattern |
|---|---|---|---|
| Expedition parka | You expect to use it once and do not want to haul it through airports | You live in a cold climate or plan more polar or alpine trips | High to buy, often reasonable to rent |
| Waterproof shell pants | You do not own fully waterproof trousers already | You know your fit well and will reuse them for wet, cold travel | Moderate to high either way |
| Knee-high rubber boots | You only need them for landings and do not want to store them later | You will use them again in similar wet, cold conditions | Usually better to rent for one trip |
| Base layers | Rental is rarely attractive for comfort and hygiene reasons | You want reliable fit, comfort, and future use | Better value to buy |
| Fleece mid-layer | You already own one or can borrow one easily | You travel often in cold climates | Usually buy or reuse |
| Gloves and liners | You can accept limited fit options | You want a photography-friendly setup that matches your hands | Buying often pays off here |
The pattern stays consistent even when operator policies and brand prices vary. Rent the bulky specialists. Buy the personal layers.
The simplest budget formula
Use this rule and you will avoid most expensive mistakes:
- Buy: Items that touch skin, affect comfort every day, or need precise fit
- Rent: Large, specialized outerwear and boots
- Reuse: Ski layers, fleece, wool socks, sunglasses, neck gaiters, and dry bags you already own
One last point for photographers. Keep your own glove liners, mid-layers, and pocket system even if you rent the outer shell. That combination saves money without sacrificing the small details that keep you shooting comfortably on deck or during a windy landing.
Your Final Antarctic Packing Checklist
The night before your first landing is when bad packing shows up. You pull on every layer you planned to wear, zip the shell, bend to tighten a boot, and realize the whole system fights you. Fix that in the cabin, not on a cold Zodiac ride.
A final checklist matters less as a gear inventory and more as a stress test. Put the full outfit on once. Reach overhead. Squat. Sit. Open and close pockets with gloves on. If the jacket strains across your shoulders or your waistband rides up when you sit, swap pieces now. Antarctic clothing has to work as a system, especially if you want to handle a camera without exposing skin every few minutes.
Master clothing checklist
Pack for rotation, not excess.
- Base layers: 2 to 3 sets of thermal tops and bottoms for a standard trip, especially if you want one dry set ready at all times
- Daily tops: A few long-sleeve shirts for shipboard wear and easier temperature control indoors
- Mid-layer insulation: Fleece jacket, grid fleece, light insulated vest, or a combination you already know fits under your shell
- Waterproof outerwear: Expedition parka if provided, plus waterproof trousers if required by your operator or activity plan
- Foot system: Knee-high waterproof boots, liner socks if you like them, heavyweight wool socks, and at least one spare dry pair
- Hand system: Thin liner gloves, one warm insulated pair, and a waterproof outer option if your main gloves are not fully weatherproof
- Head and face protection: Warm beanie, neck gaiter or balaclava, hood, and sunglasses or goggles for glare and wind
- Sun care: High-SPF sunscreen and lip balm that can handle cold, wind, and spray
- Photographer add-ons: Glove liners you trust, spare batteries stored close to your body, a lens cloth in an easy pocket, and a camera carry setup you can use one-handed
If you want a broader trip-planning companion list beyond cold-weather clothing, this backpacking essentials list helps separate expedition gear from the rest of your travel kit.
Pre-landing cabin check
Run this quick check before every outing:
- Fit check: Your shell should close easily over your planned layers, with enough room to move and breathe
- Gap check: No exposed skin at the wrists, neck, or lower back when you reach, sit, or lean
- Dry check: Fresh socks and dry gloves go in your day setup, even if yesterday's pair seems good enough
- Pocket check: Sunscreen, gloves, batteries, and lens cloth should be reachable fast
- Activity check: Dress for the specific job ahead. A quiet photo session on deck, a wet Zodiac transfer, and a kayak outing do not need the exact same setup
Photographers usually need one extra adjustment. Keep your liner gloves on your hands, not buried in a pocket, and keep spare batteries in an inside pocket near body heat. Rented outerwear is often fine. The small personal items are where buying your own kit pays off.
A good Antarctic outfit fades into the background. You stay warm, dry, and mobile, and your attention stays on the ice instead of your sleeves.
Travel planning gets easier when advice respects both budget and real-world use. For more practical, affordable, and thoughtful travel guides, visit Travel Talk Today.